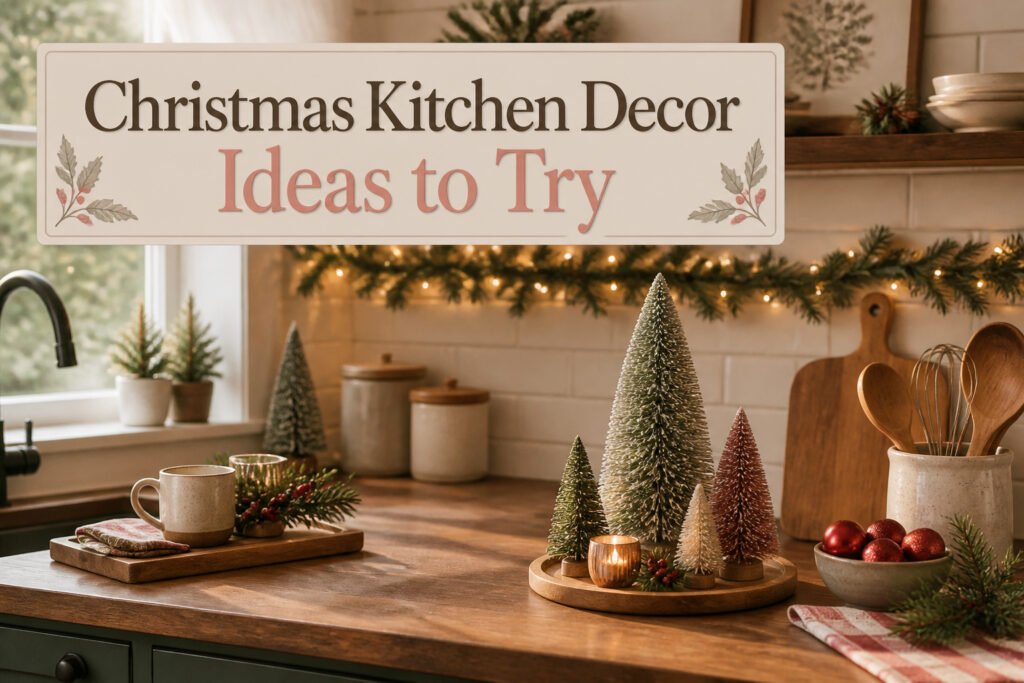
A kitchen decorated for Christmas can run from a single strand of battery lights above the sink to a full island centerpiece, and the deciding factor is usually counter space, not budget. The difference between a room that feels finished and one that feels crowded comes down to keeping two-thirds of every surface clear for actual cooking. My own turning point was swapping a fourteen-inch mini tree, which blocked my knife block and grazed the cabinets, for a set of nine-inch bottlebrush trees that cleared the faucet and left the counters workable.
1. Hang a Garland
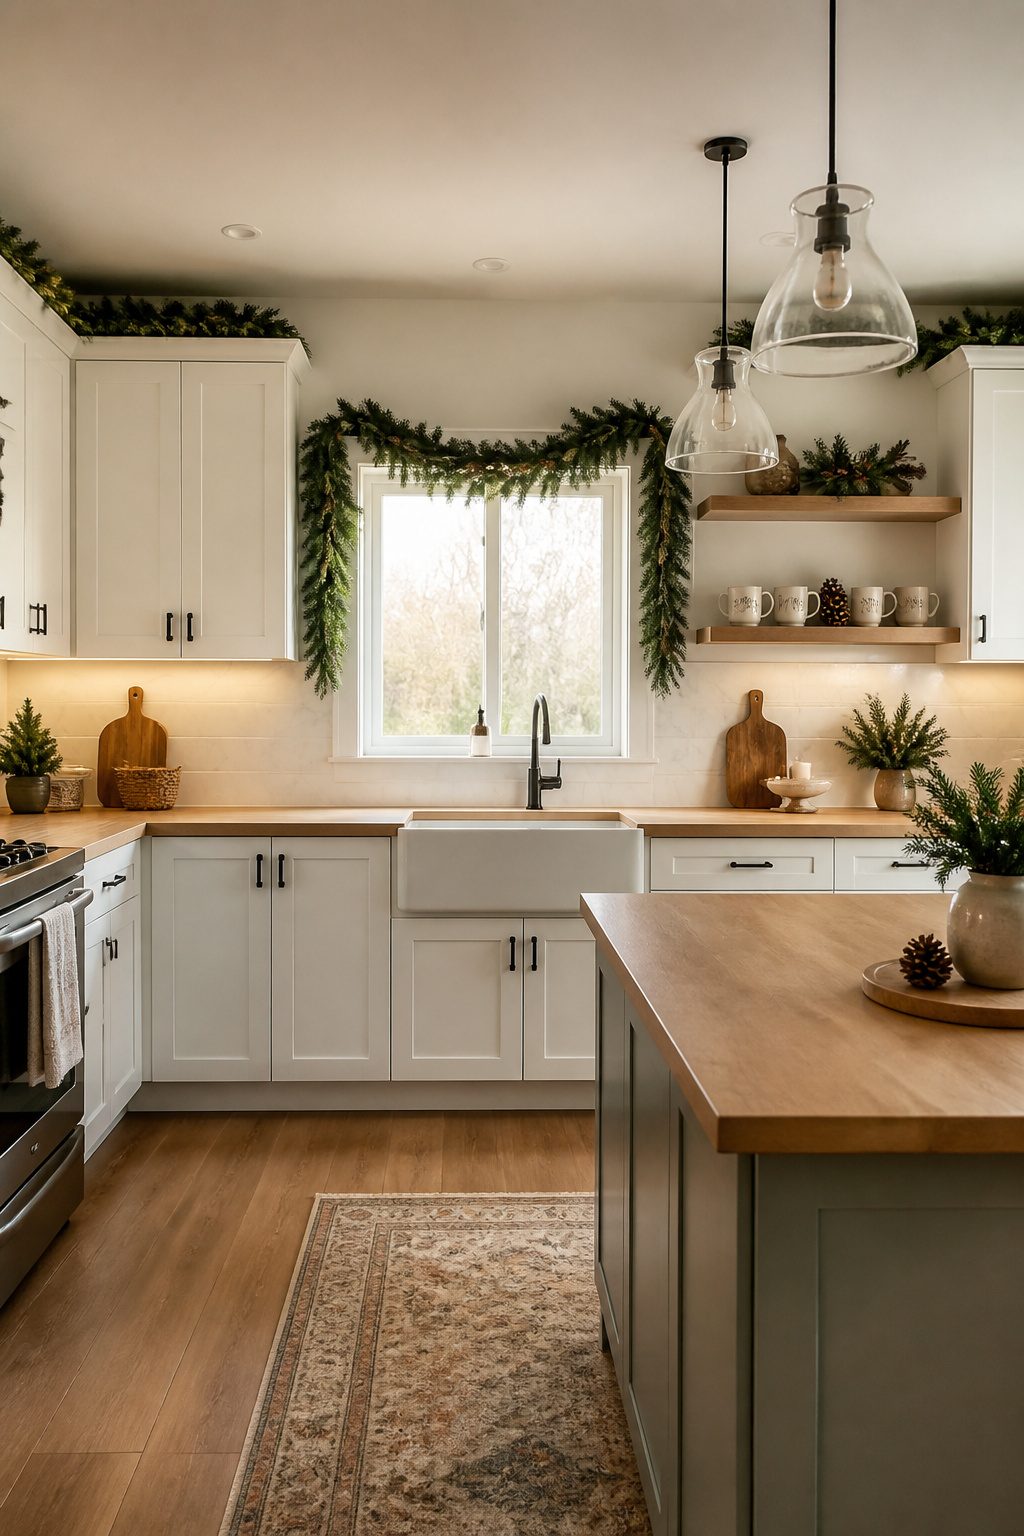
A kitchen decorated for Christmas reads as finished the moment greenery hits a horizontal line. I learned that the hard way after years of draping garland only across the mantel and wondering why the kitchen still felt bare.
The window over my sink was the first place that worked. I ran a faux garland along the casing, not across the glass, and the soft, flexible branches kept it from looking like a pipe cleaner. That same pliable greenery now sits on top of my cabinets every December, though renters should test first: some landlords flag anything that touches painted surfaces with adhesive.
Open shelving is where I got greedy and lost. I packed garland, pinecones, and seasonal mugs onto one shelf, and the result was a green blob with no place for the eye to rest. What saves the look is framing, not filling. A single garland line along the shelf edge, or a small wreath hung on a cabinet front, gives the kitchen symmetry without the clutter.
Fresh garland against marble backsplash and white pendants, like the Studio McGee look, is the standard I measure against now. Wood tones underneath help. My laminate counters do not, so I keep the greenery higher, above the hard surfaces, where the texture reads as intentional rather than apologetic.
The one detail that matters most: flexible greenery reads as real; stiff branches read as craft store. Bend it before you buy it.
2. Create a Hot Cocoa or Coffee Station
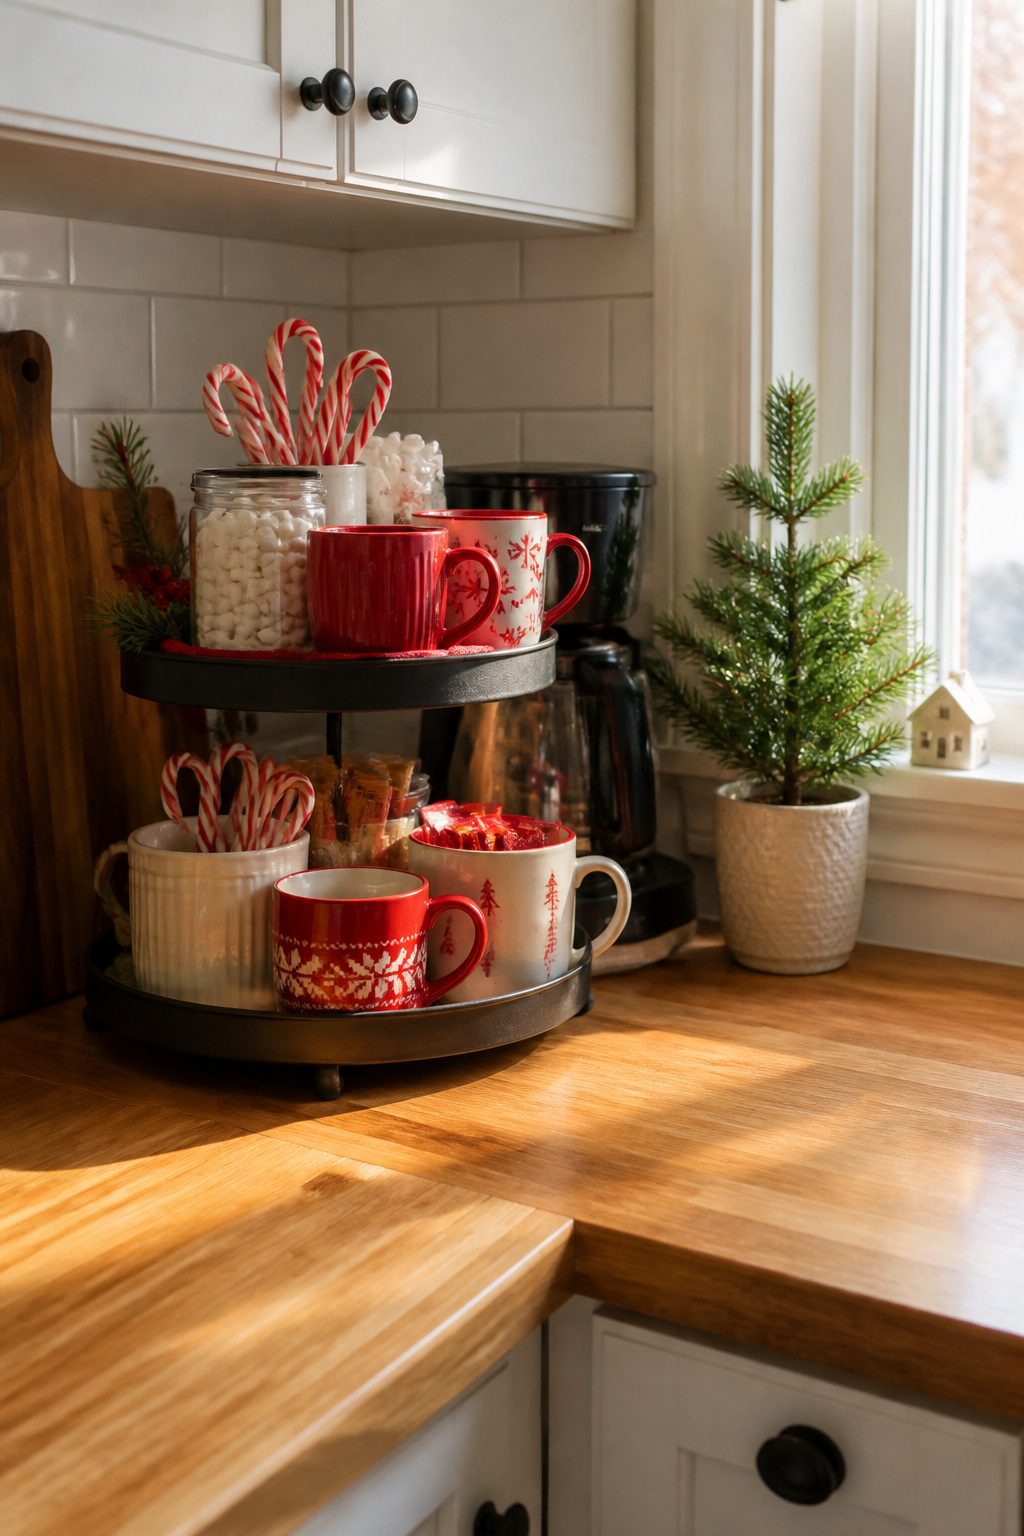
A corner of the counter cleared for December becomes the spot everyone drifts toward. I set mine up with a tiered tray, the three-level kind that keeps the footprint small while the display reads generous. Mugs stack on the bottom, cocoa packets and a mason jar of marshmallows sit middle, and the top holds whatever feels right that year, peppermint sticks or those oversized stirring spoons.
The tray matters because it lifts everything off the work surface. When the kitchen is already handling cookie sheets and grocery bags, a contained station moves aside without becoming clutter. Some years I have used a single tray; other years a two-tier stand when the counter was tighter.
Flavor variety is where the station earns its keep. Classic cocoa, white chocolate, peppermint, each in its own jar with a small scoop. Toppings in short jars with lids keep the marshmallows from going stale before New Year’s. The whole arrangement costs what you were already spending on hot drinks, just displayed instead of cabinet-hidden.
3. Incorporate Mini Trees
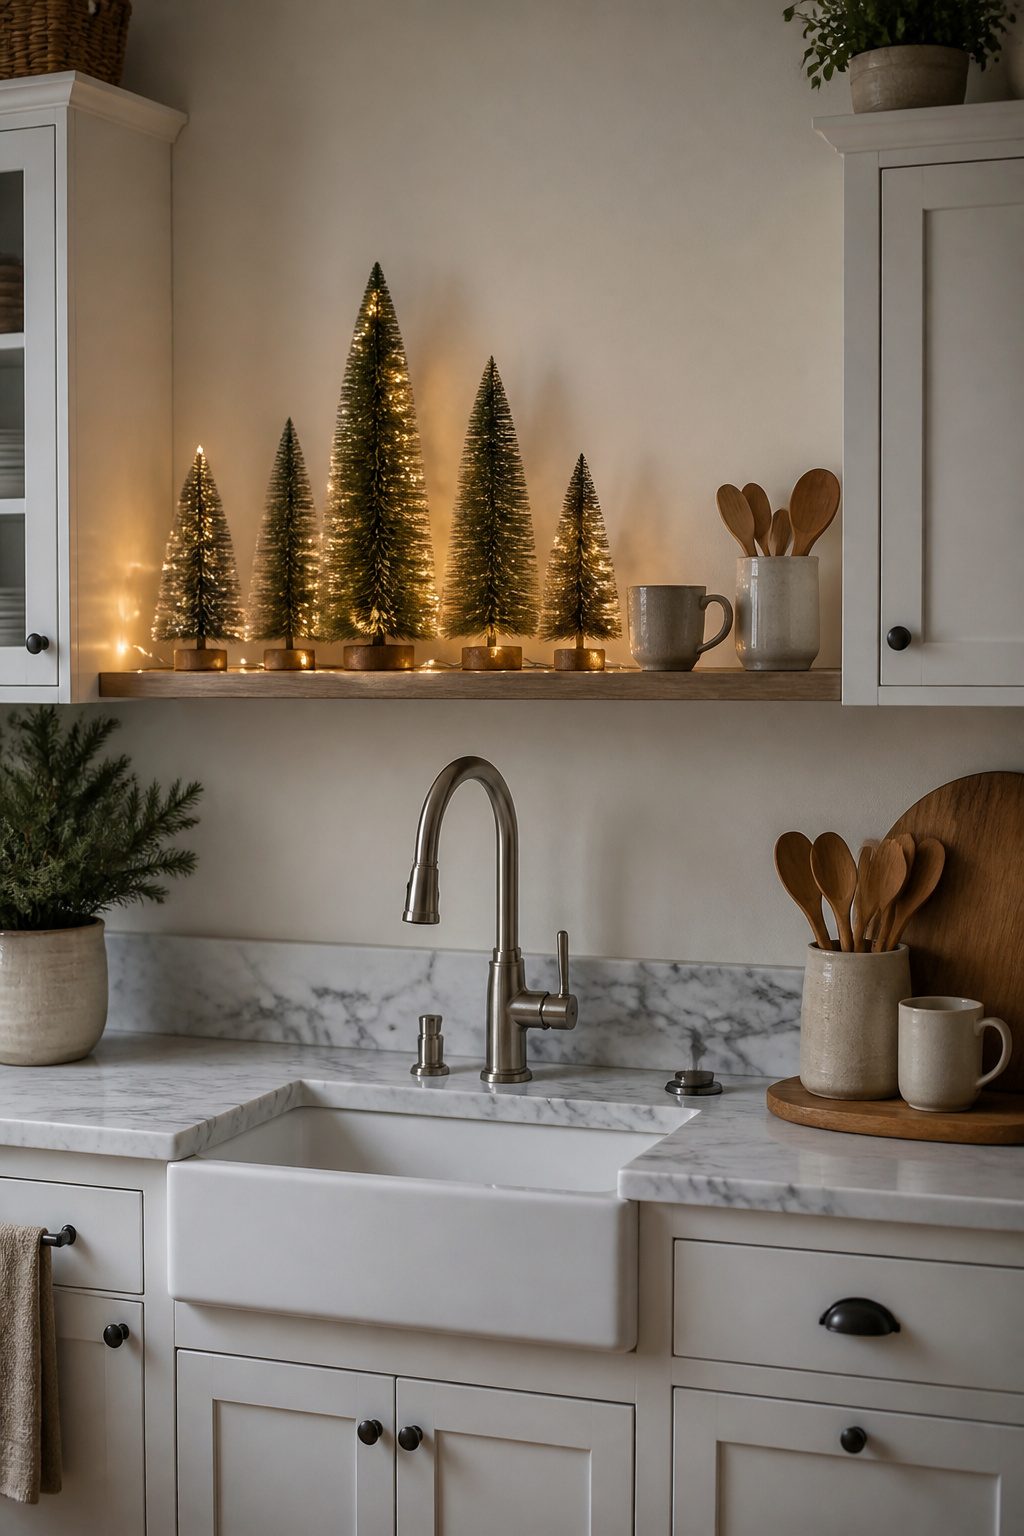
Counter space is the first thing to disappear in a December kitchen, so the trees that actually fit are smaller than the ones in your head. Mine came from Target’s Threshold line with Studio McGee, a set of bottlebrush trees in graduated heights that top out around nine inches. That size clears standard upper cabinets and still leaves room behind for the coffee maker to breathe. West Elm and Anthropologie both sell ceramic and sisal styles if you want weight and texture instead of soft bristles, though those read more decorative and less like a shrunken forest.
The mistake I made was buying a fourteen-inch mini tree on clearance, thinking the extra height would make it read "real" from across the room. It read as a wall. The tip grazed the bottom of my cabinet, and the base took up so much depth that my knife block had to move to the windowsill. Anything over a foot tall fights your backsplash unless you have a deep island or a bare corner to give it, and even then it competes with anything you actually need that surface for. The nine-inch set now lives on a narrow shelf above the sink, where the tallest one just clears the faucet when it swings forward. The smallest sits on the cooktop-side counter in a basket with utensils, the same trick I saw in a tray arrangement: the tree turns a functional spot into something seasonal without requiring its own real estate.
4. Use Wreaths on Cabinets
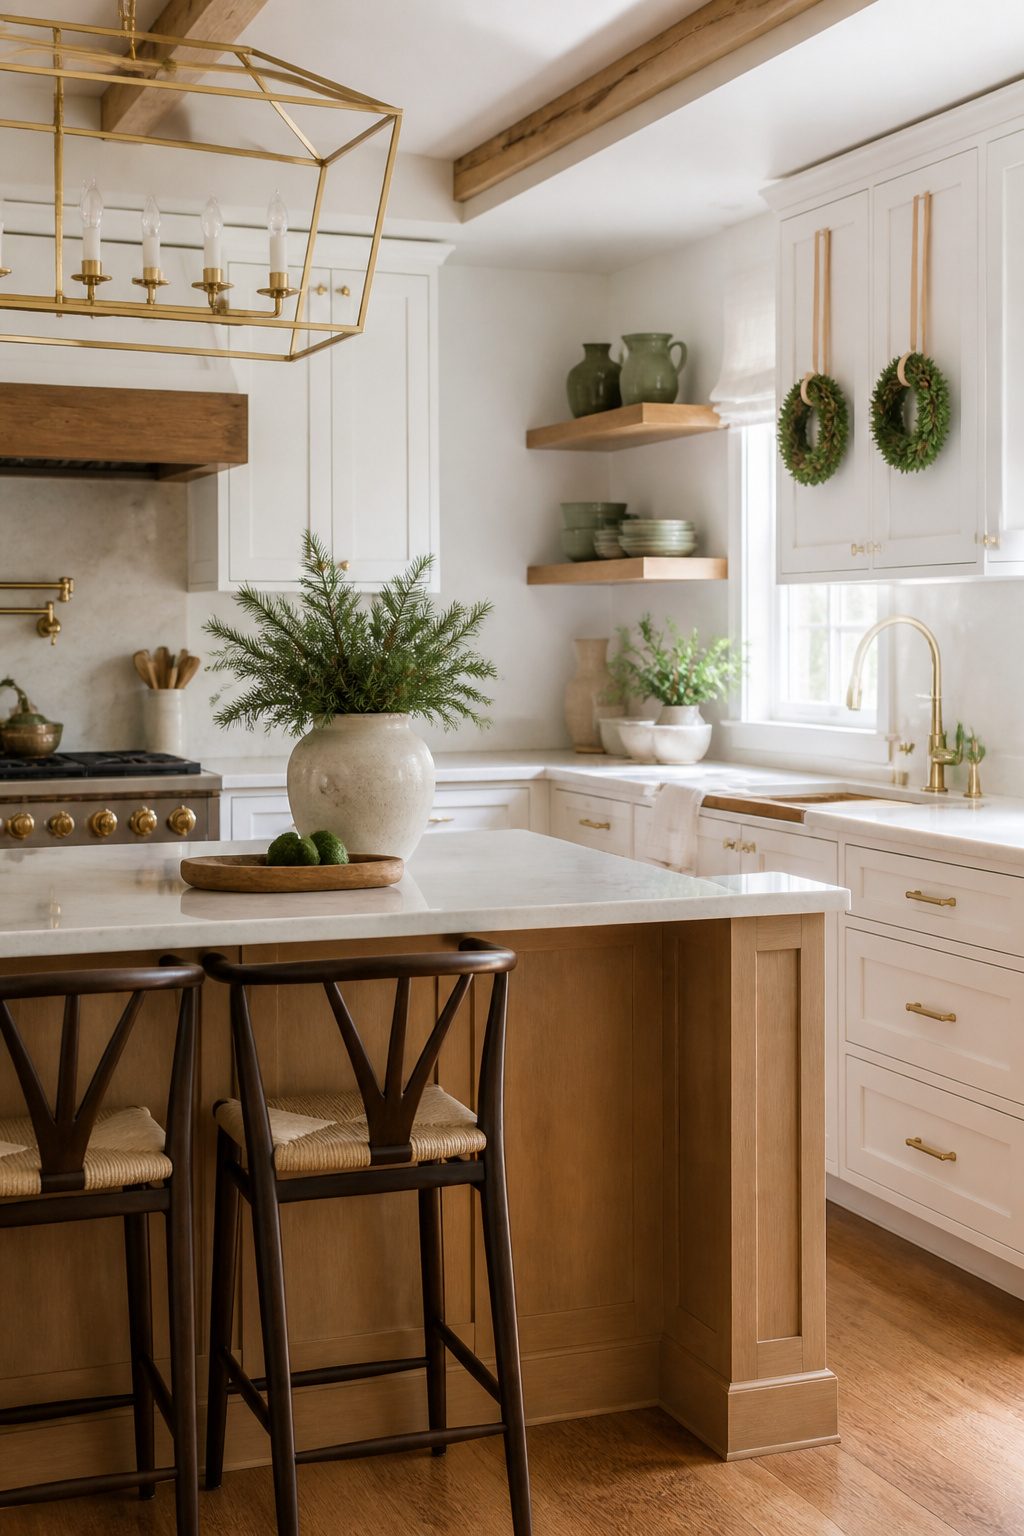
Mini wreaths on cabinet doors add holiday charm without eating an inch of counter space. The trick is hanging them so the hardware disappears.
Two ways to play this. One source swears by attaching a small Command hook upside-down on the inside of the cabinet door, then looping ribbon or clear fishing line through the hook and the wreath so it hangs over the top edge. Another writer used that same approach after years of relying on Scotch tape, and left the hooks in place for two years running; they still hold fine, which makes annual setup a two-minute job.
The hook type matters. Small Command hooks hold here. The Scotch tape method someone admitted to does not, at least not for long, and the writer who tried it laughed at the memory. Ribbon with a small slit cut through it hooks cleanly, no knots needed.
Any pretty ribbon works. One writer has used the same holiday ribbon for roughly eight years, so this is not a buy-it-fresh-every-December situation. The wreaths themselves stay lightweight enough that heavy hardware is overkill.
5. Add Seasonal Dishware
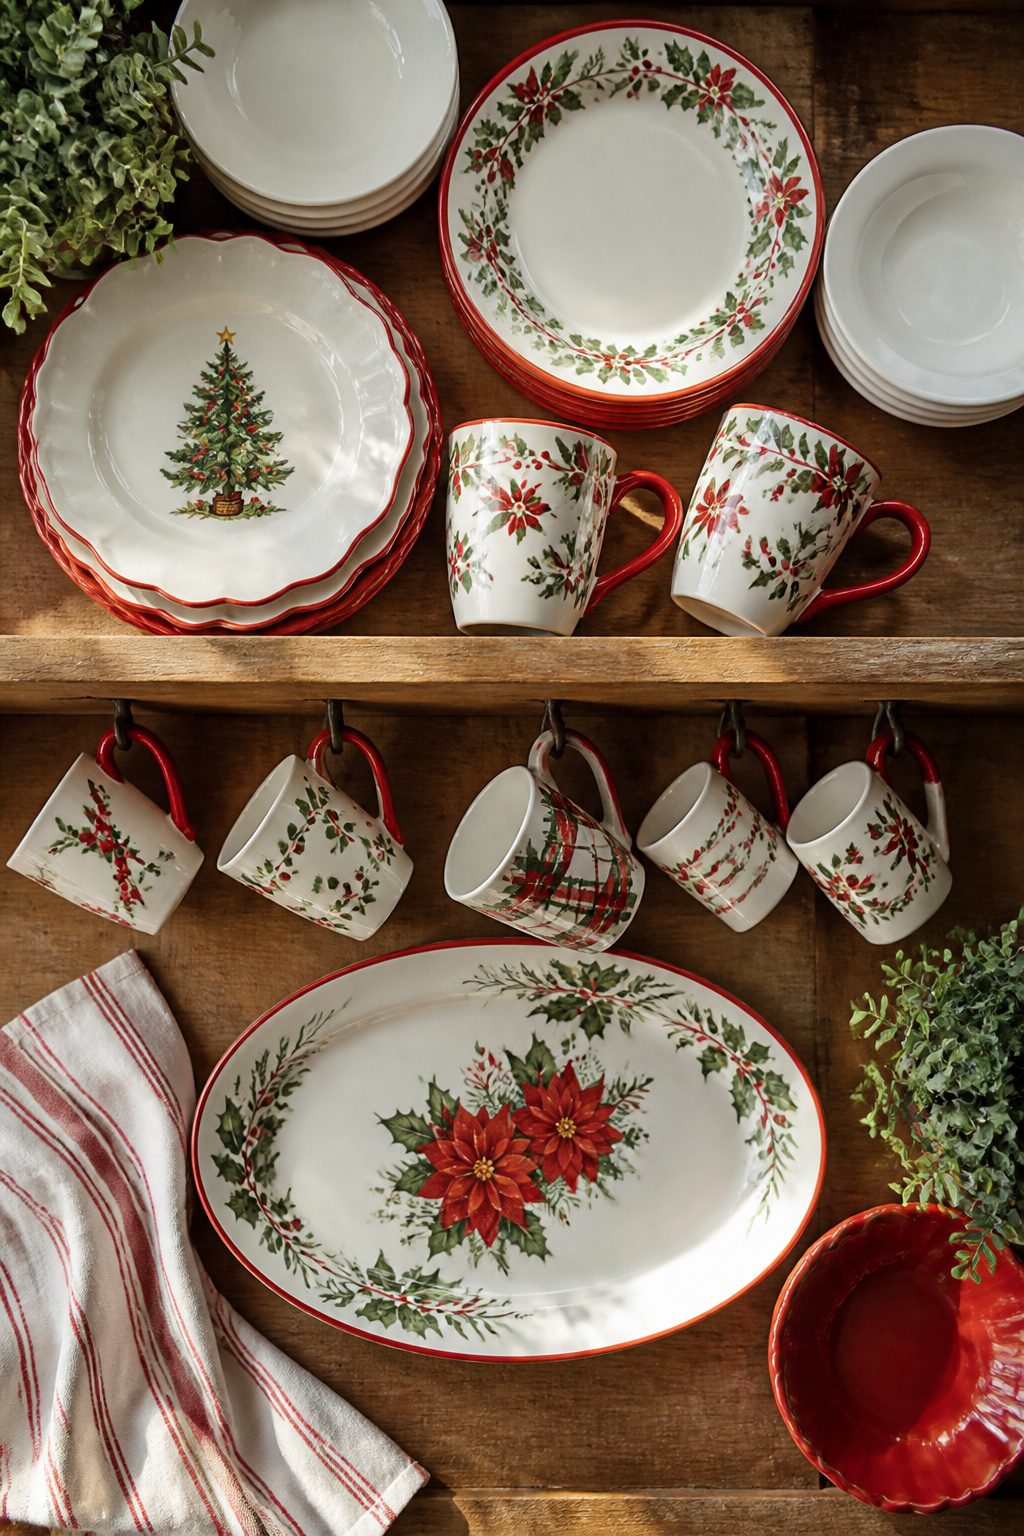
Holiday plates and mugs do most of the visual work in my kitchen, and the trick is rotating a small collection instead of storing a full second set. I keep six Christmas mugs, two dessert plates, and one platter that all stack inside my everyday dishes. They take up one shelf.
A wall mug rack doubles as display: hang the seasonal pieces front-facing and push the plain ones to the back. Open shelving works the same way. If you have a hutch or even a single glass-front cabinet, that is where the swap pays off.
The platter sits out as a base for a centerpiece or holds nothing at all and still reads as decoration. Mugs corral candy canes, spoons, or those red-and-white cocktail picks that otherwise wander into junk drawers.
Put the Christmas china on full display this season.
A hand-built hutch is not required. Any shelf you already own, cleared of its usual clutter for December, does the same job: it frames the pieces and makes the kitchen feel intentional without the cost of a full cabinet overhaul.
6. Decorate the Kitchen Island
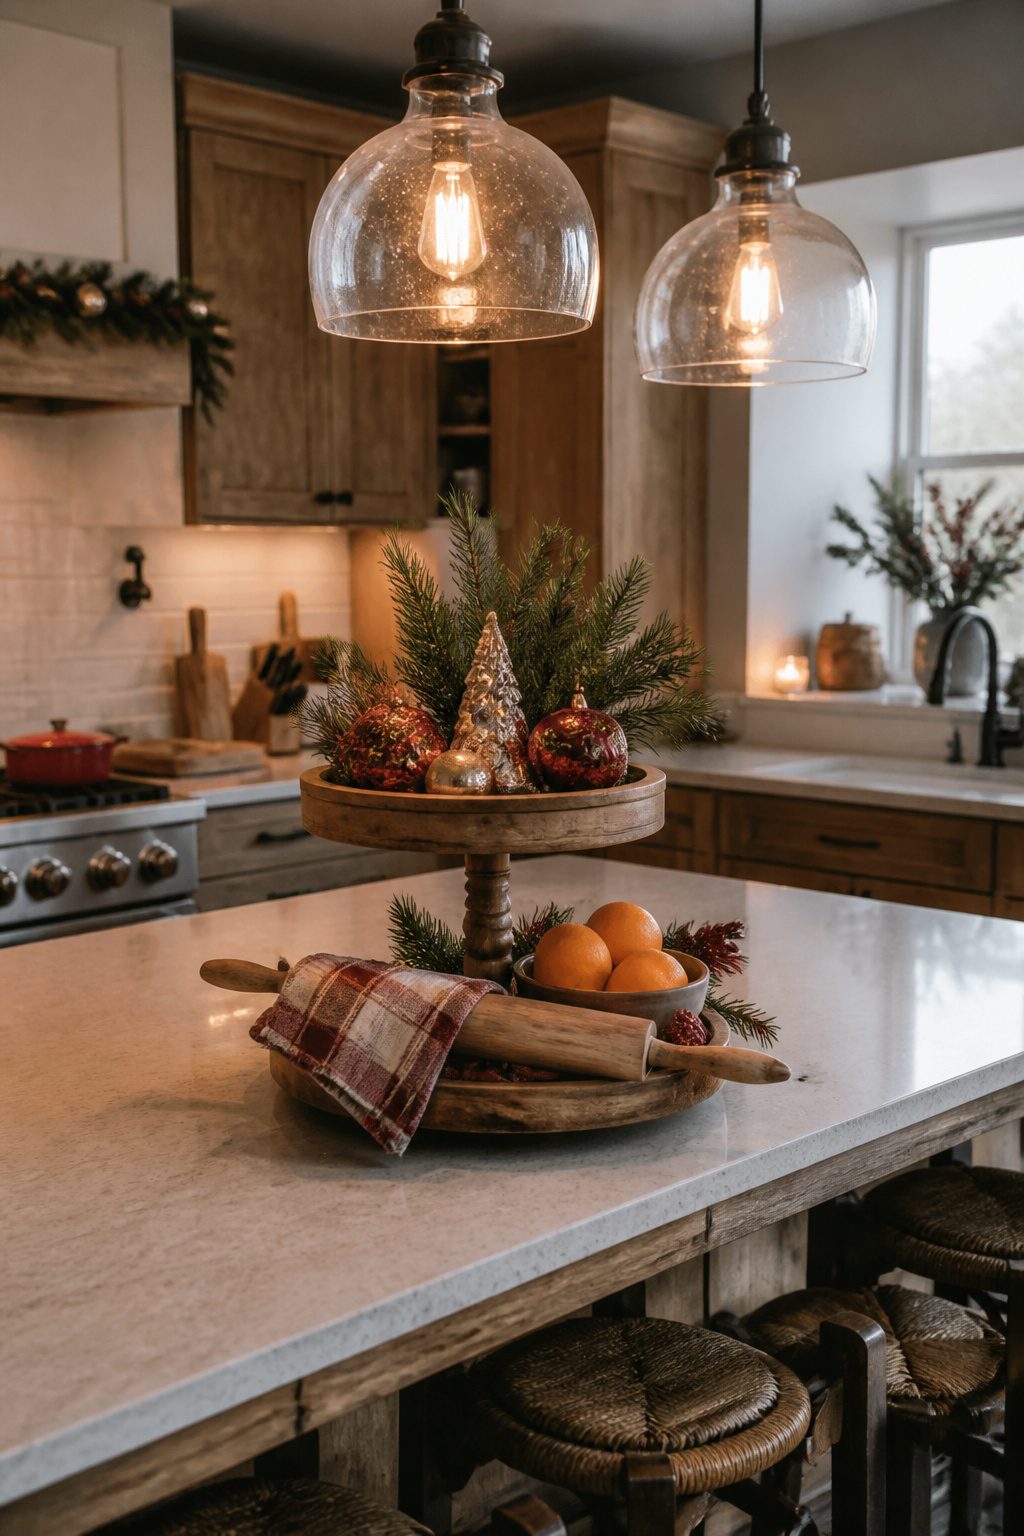
The kitchen island sits dead center, so it draws the eye whether you plan for it or not. My first attempt treated every inch of flat surface as fair game: a wooden sign, a cluster of candle jars, a small tree, plus the fruit bowl that lives there year-round. By day two I was shifting it all to one end just to roll out pie dough.
What stayed was a single two-tiered tray, the kind farmhouse suppliers sell for exactly this purpose. The vertical layering keeps the footprint small; the height reads as decoration without spreading sideways across your workspace. I run greenery along the back rail, tuck in a few vintage-look ornaments, and leave the lower tier open for whatever I am actually using that morning. A rolling pin or a half-peeled orange looks intentional there, not like clutter you have not put away.
Keep at least two-thirds of the island clear for real work, especially if your household gathers there the way mine does. The tray moves to the counter by the fridge when I need the whole surface, which takes about ten seconds and no rearranging of individual pieces. That portability is what makes the island feel decorated rather than occupied.
7. Drape Garland and Lights
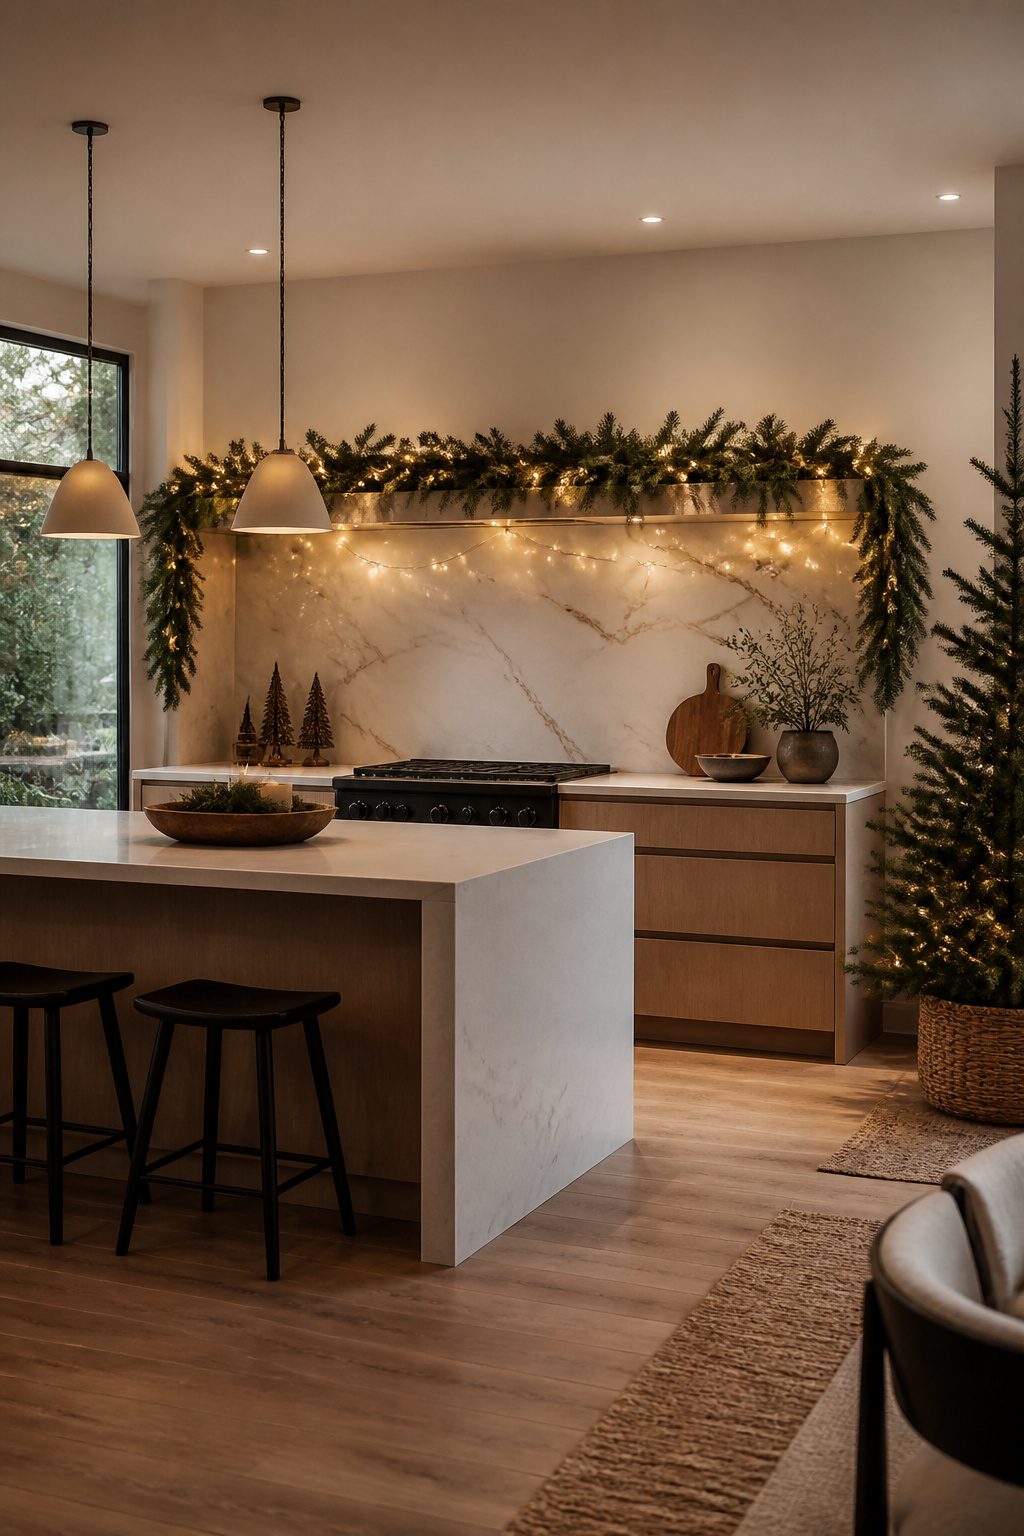
String lights threaded through greenery shift the whole feel of a kitchen from decorated to actually warm. The trick is treating the plug as a design problem, not an afterthought. Battery-operated lights solve the outlet hunt entirely, and they are the only way to get a glow along a window swag where no cord wants to run. I tried draping a wired strand over my sink-side garland once and spent December stepping around a brown extension cord that collected dishwater splatter. The battery pack hidden in the foliage won the next year.
Fairy lights against garland flourishes soften even industrial kitchens into something you want to stand in at six a.m. One warm strand behind open shelving does more than a whole box of figurines, and it costs the same as a decent wreath. If you do run wired lights, map the route from the outlet before you hang anything; nothing deflates the look faster than a cord tacked across the backsplash with whatever tape was in the junk drawer.
8. Build a Centerpiece
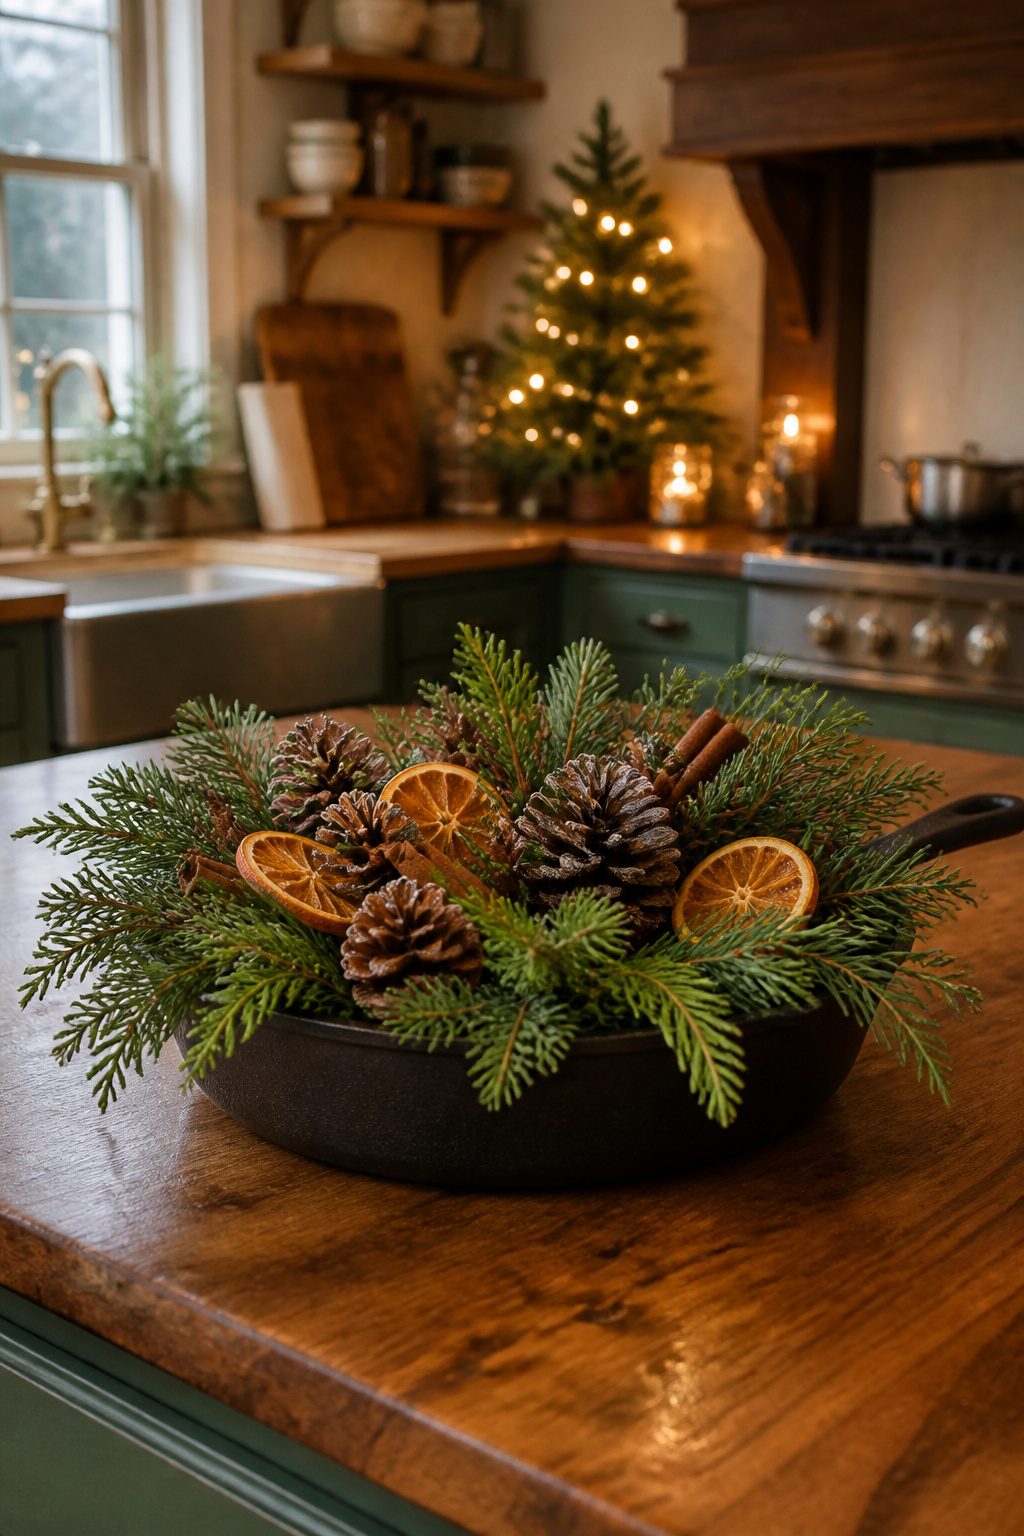
A centerpiece on the kitchen island or table anchors the whole room, but the wrong one leaves you vacuuming needles for a week. My first attempt was a low bowl of grocery-store evergreen branches tucked around red taper candles, all of it held together with florist foam. The whole thing cost maybe $14, and for about ten days it looked like something from a magazine spread. Then the drying started. By day twelve, brushing past the island sent a shower of brown needles onto the floor, and the candles had tilted into the branches from the weight. I spent more time with the handheld vacuum than I did enjoying it.
What replaced it was a mix of faux cedar garland from the craft store and real pinecones I collected and baked to open. The garland stays green, the pinecones add the texture and smell without the mess, and the whole arrangement sits in a cast-iron skillet I already owned. I swap in a few cinnamon sticks or dried orange slices each year to change the scent. The upfront cost was higher, but three seasons in it has already paid for itself against buying fresh greens twice a winter.
9. Swap Out Everyday Items
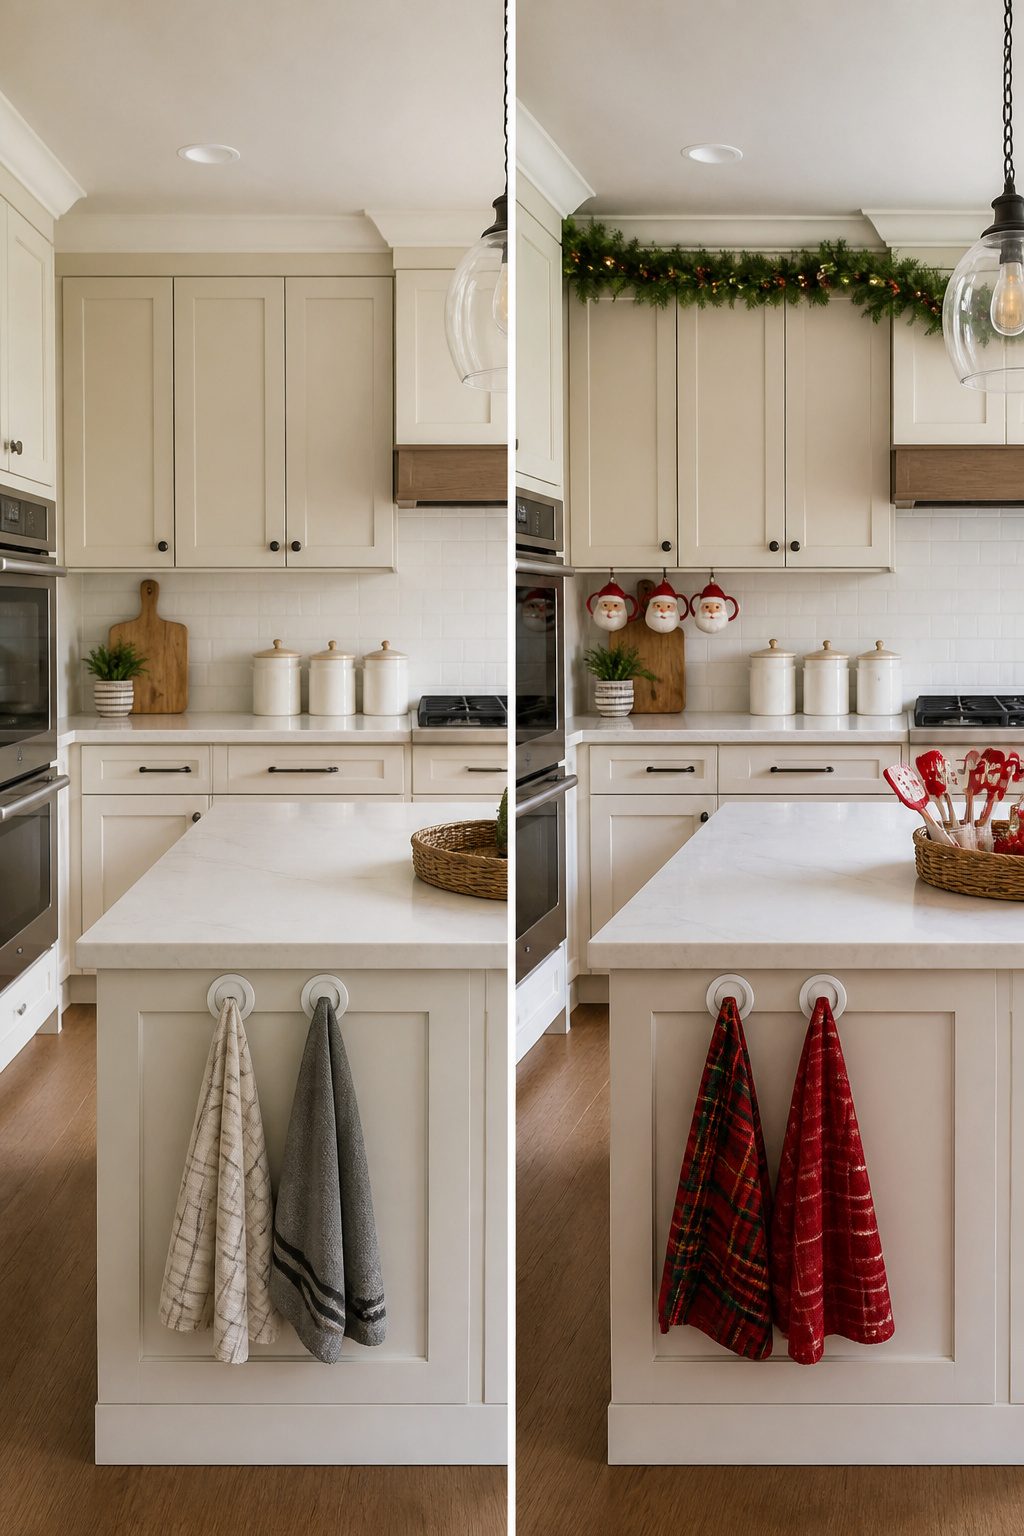
The Christmas towels come out first, usually the week after Thanksgiving. I hang two plaid ones from suction cups on the island end so I do not drill into the cabinet face. The rest of the kitchen stays exactly as it is: the stainless canisters, the bamboo utensil holder, the plain dish soap bottle. Replacing every visible object at once makes the room look like a stage set rather than a home someone actually cooks in.
Mugs are the one exception I make for quantity. I swap the whole daily stack for Mrs. Claus and reindeer versions because we reach for them three times a day, and the novelty wears off faster than a single towel. The salt and pepper grinders stay put year-round; only the shakers on the stove-side tray change to a small Santa pair. That tray holds the same grinders and cellars all year, so the swap reads as a detail someone noticed, not a department store aisle exploded onto the counter.
The rule I follow: change one item per zone, not the zone itself. The cooking utensil jar keeps its same spatulas and spoons. I add one or two colorful Christmas spatulas and a mini tree in the basket beside it. The dog treat jar stays right where it is, unchanged. Forced cohesion, everything matching, is what tips a kitchen from festive to frantic. The eye needs somewhere to rest.
10. Incorporate Natural Elements
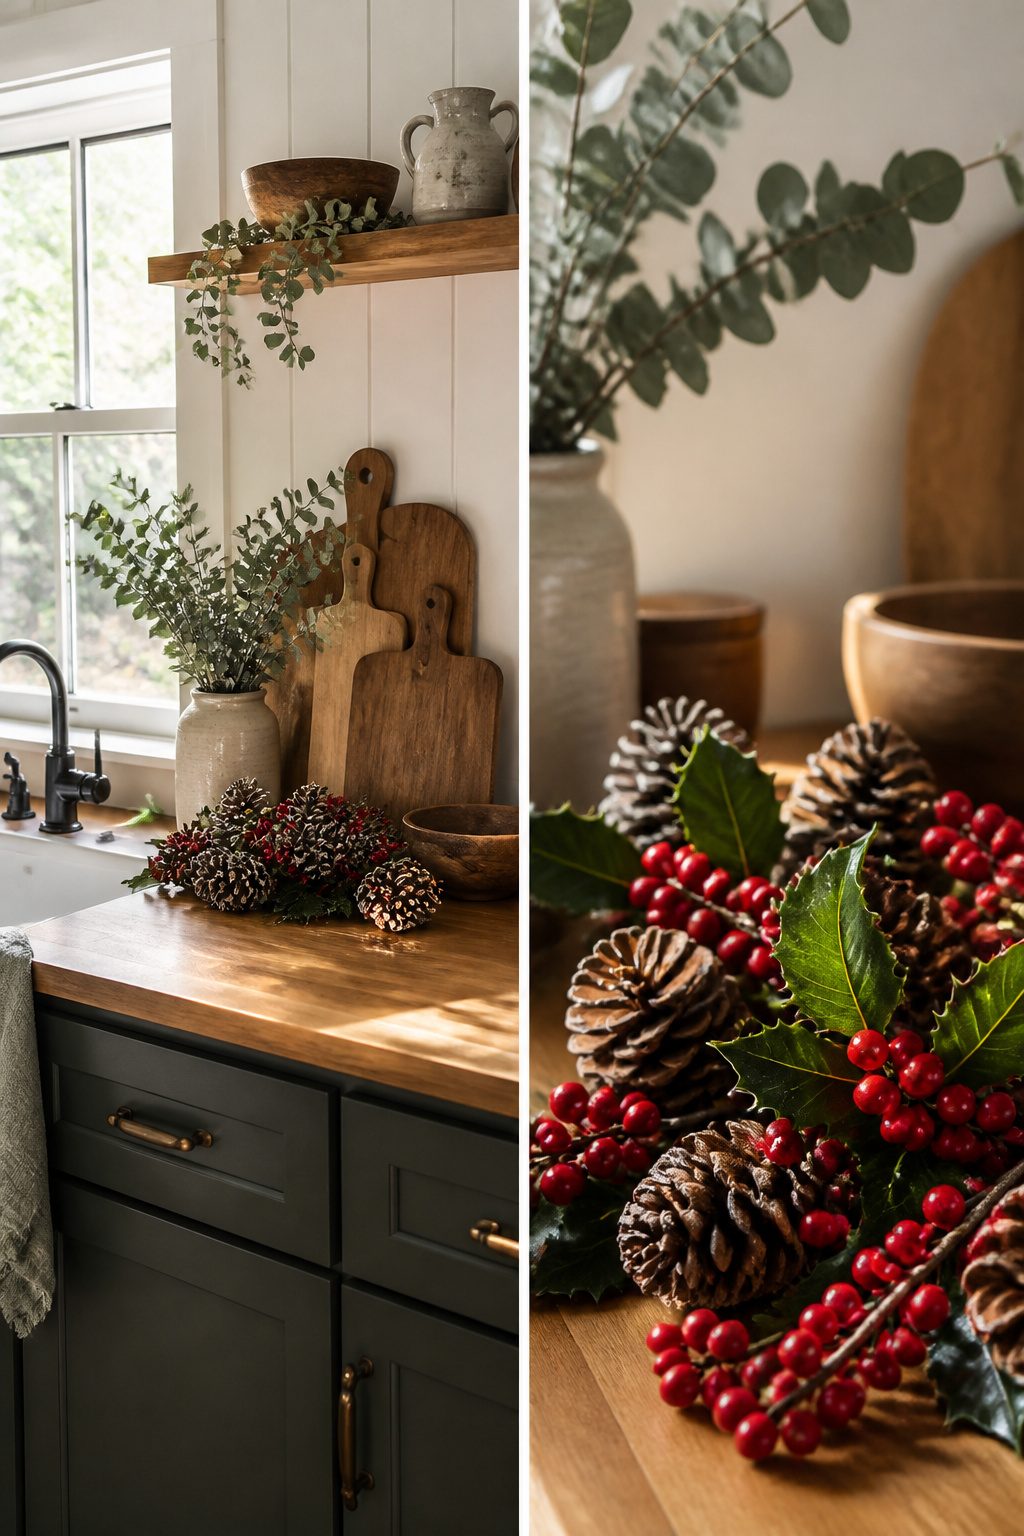
Fresh cedar branches lasted about two weeks on my cool windowsill, but the same greenery wilted into a brown mess in four days when I set it near the stove. Pinecones and holly berries dry out rather than rot, so counters away from heat are safer bets for anything living. Warm countertops cut fresh greenery’s lifespan by more than half, and I learned that the hard way.
The mistake I didn’t see coming was ants. A few pinecones I’d collected from the yard still had sap and something sweet underneath their scales. Within a day, a thin line of them marched across my backsplash and into a bread box. Now I bake pinecones in a low oven for an hour before bringing them inside, or I buy the bagged kind from a craft store and skip the risk entirely. Berries on woody stems, like winterberry or nandina, hold up better than clipped greenery and don’t draw insects the same way.
Stick to Two Colors
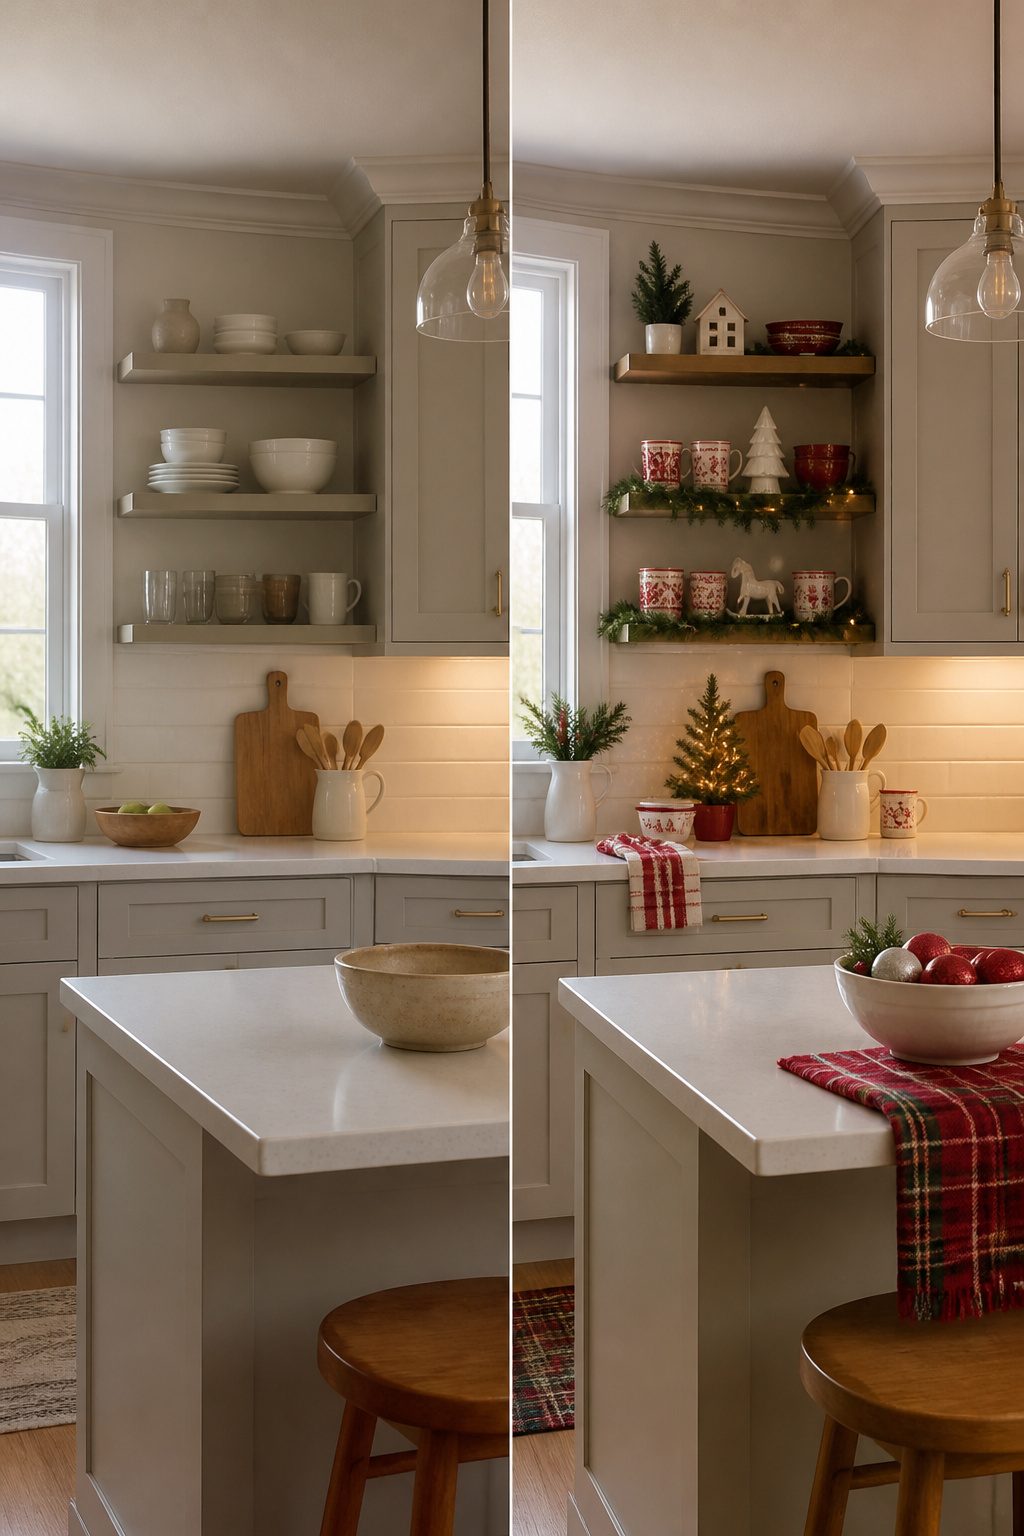
Two years back, my kitchen Christmas decor looked like a holiday aisle had exploded in it. Red plaid fought with silver tinsel, green garland tangled with gold candlesticks, and somehow a nutcracker collection ended up next to the coffee maker. The room felt busy, not festive.
Limiting the palette to two main colors changed everything. Red and white is the classic pairing for a reason: it reads instantly as Christmas without demanding matching ornaments from a single collection. I chose mine by looking at what I already owned. My everyday dishes are white, my kitchen walls are soft gray, so I added forest green and let the white serve as the second color. Gray became the neutral ground everything sat on.
The mistake came the year I ignored this. I found a set of navy and silver dish towels on clearance, rationalized they were "wintery," and tossed them in. They killed the warmth of the green. The kitchen looked like two different holidays were arguing. I swapped them back out by December 3rd.
Make Decor Work Harder
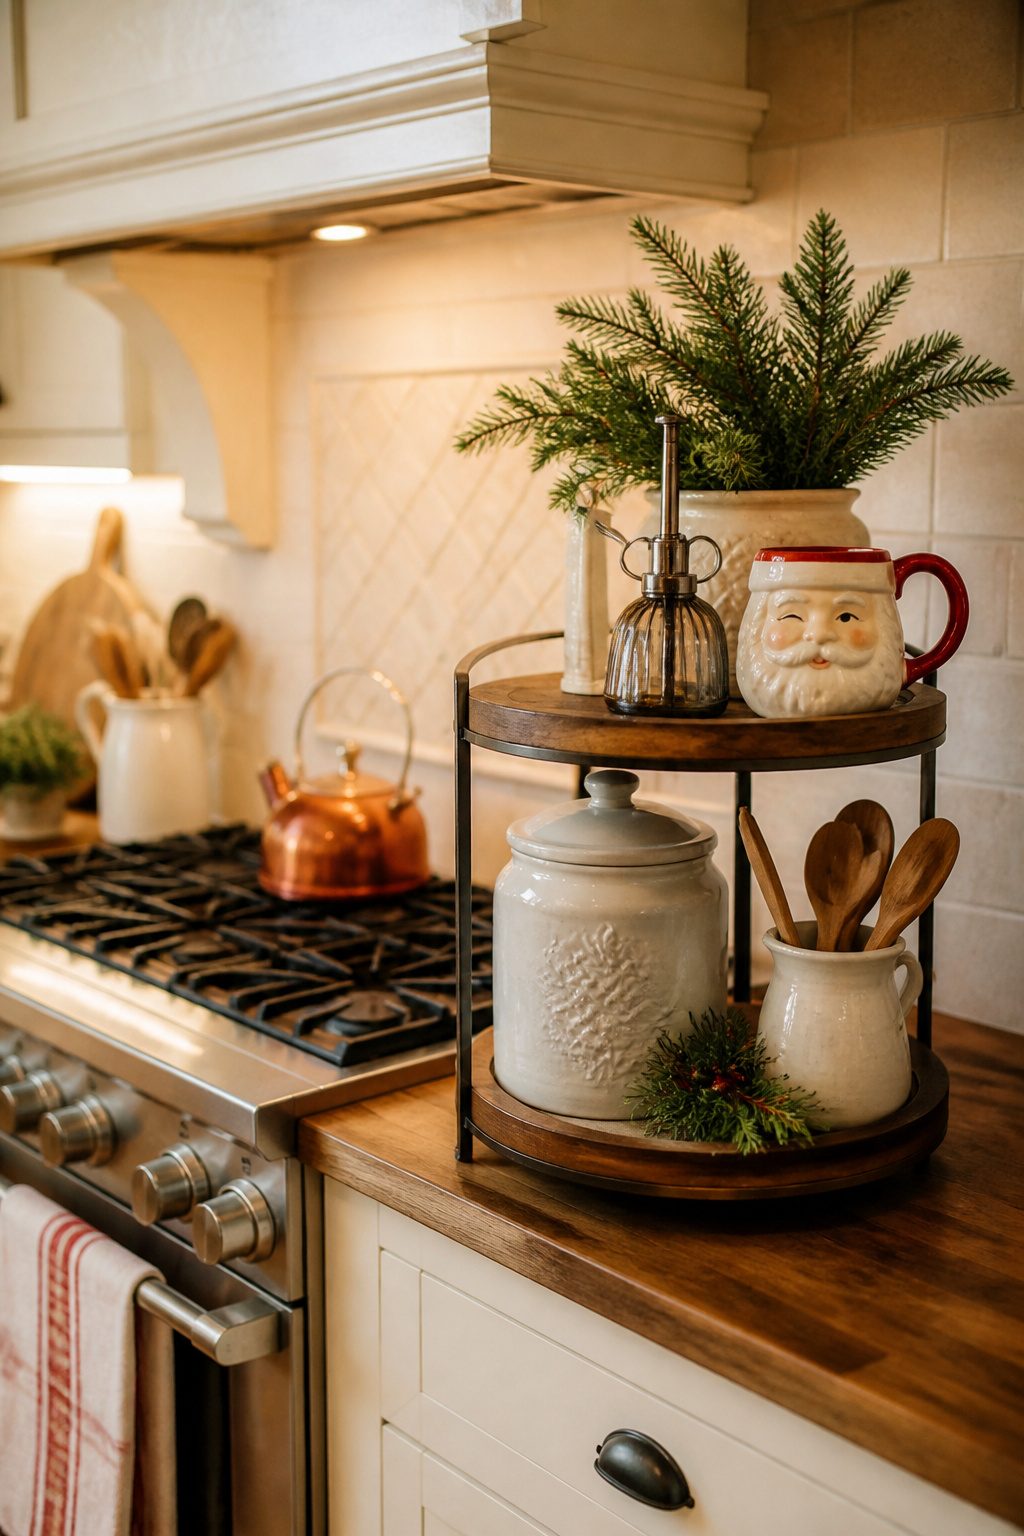
Tiered trays earned their spot on my counter because they move when I need them to. The two-tiered piece I keep beside the stove holds olive oil, a salt cellar, and the tiny Santa mug that corrals my spoon rest. When holiday baking takes over, I lift the whole thing by the handle and set it on the breakfast table. No disassembling, no shuffling individual items.
Cookie jars work the same way if you actually fill them. My gnome jar holds mandarin oranges in December instead of hiding on a shelf looking seasonal. Tea bags, kitchen scrubbers, even folded dish towels stay accessible but out of sight. The jar that just sits there collecting dust is the one I should have left at the store.
Glass canisters already live on most counters year-round. Tying a sprig of greenery and a cookie cutter to the top, or swapping the metal scoop for a Christmas plaid mug, takes under two minutes and costs nothing. The trick is starting from what you use daily and asking what small swap makes it read December instead of default.
The pieces that earn their counter space are the ones you pick up, move, and reach into. Anything else is borrowing square footage from actual cooking.
DIY What You Already Own
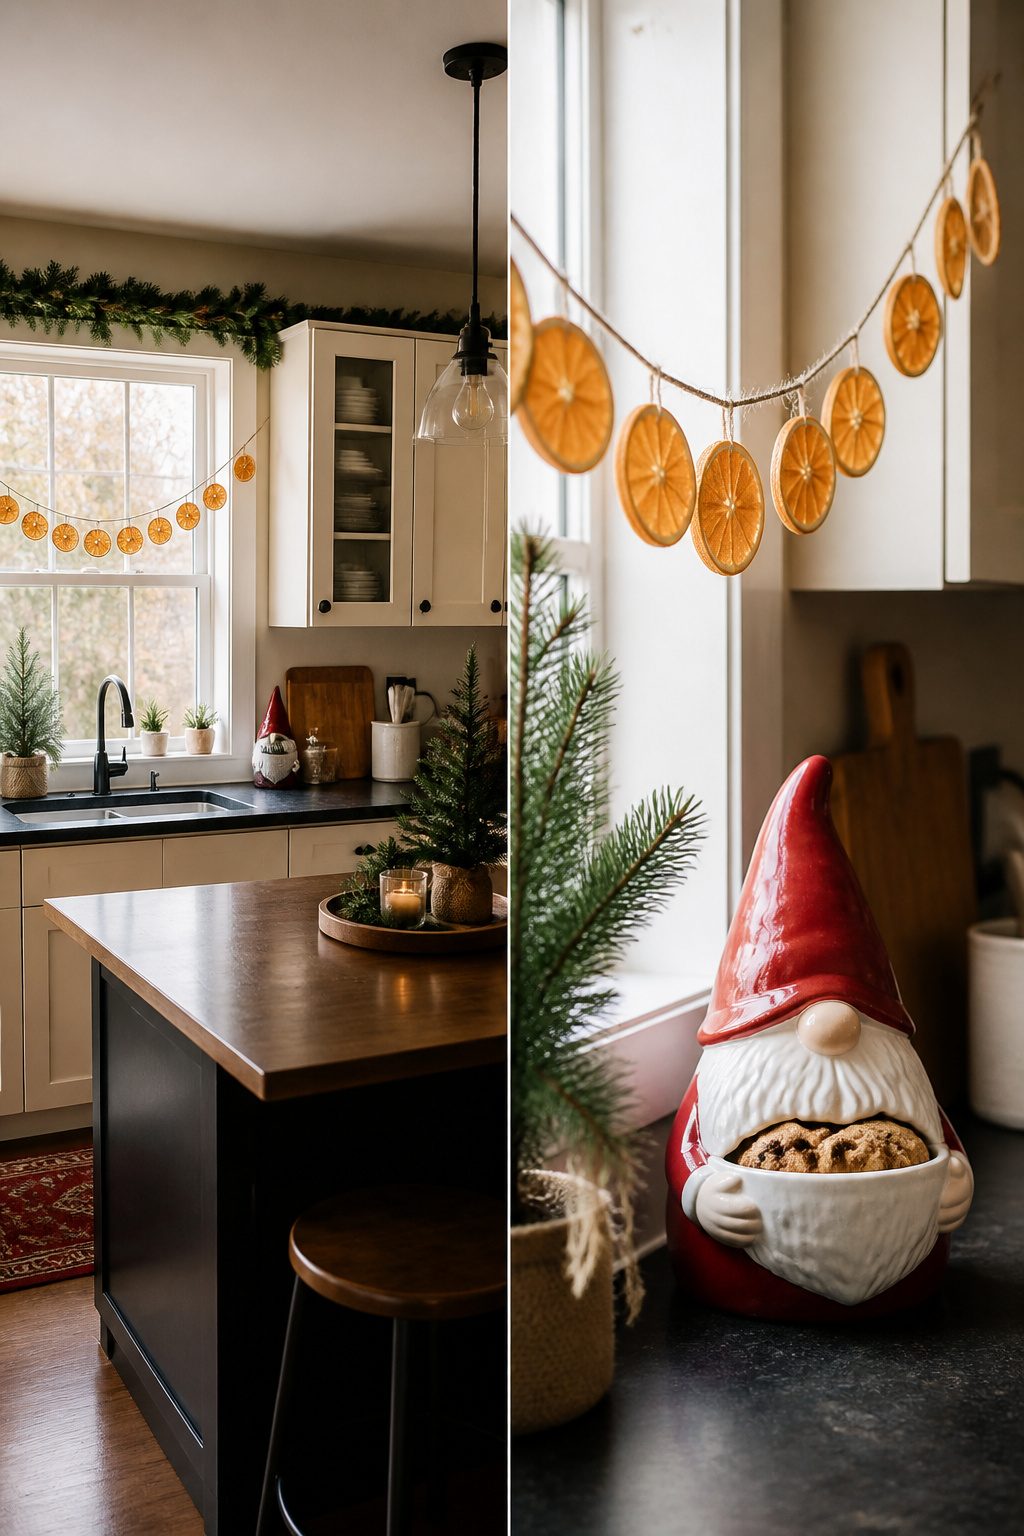
Dried orange slices strung across a window or the underside of cabinets give a kitchen a color that reads handmade, not hobby lobby. Thin slices go into a low oven for a few hours, then onto twine. The ones that crack in the drying process still work for dropping into drinks, so a jar of casualties on the counter is not a failure.
A faux greenery garland does the same job with less schedule-juggling. The ones with soft, flexible branches drape where you need them and look less like pipe cleaner. Skip anything that needs daily misting or a certain angle of light; a kitchen has enough living things to keep alive already.
Cookie jars are the easier win. A gnome-shaped one holding mandarin oranges, or a plain glass canister stuffed with tea towels, puts holiday shape on the counter while hiding the clutter you were going to shove into a drawer. The jar does not need to say Christmas to read Christmas once the room around it does.
My kid and I did try paper snowflakes, six-pointed ones, taped to the cabinet fronts. They looked like what they were: wet printer paper warping in the steam from the stove. We pulled them down by December 3. Some DIY is not worth the hour.
Light Without the Fire Hazard
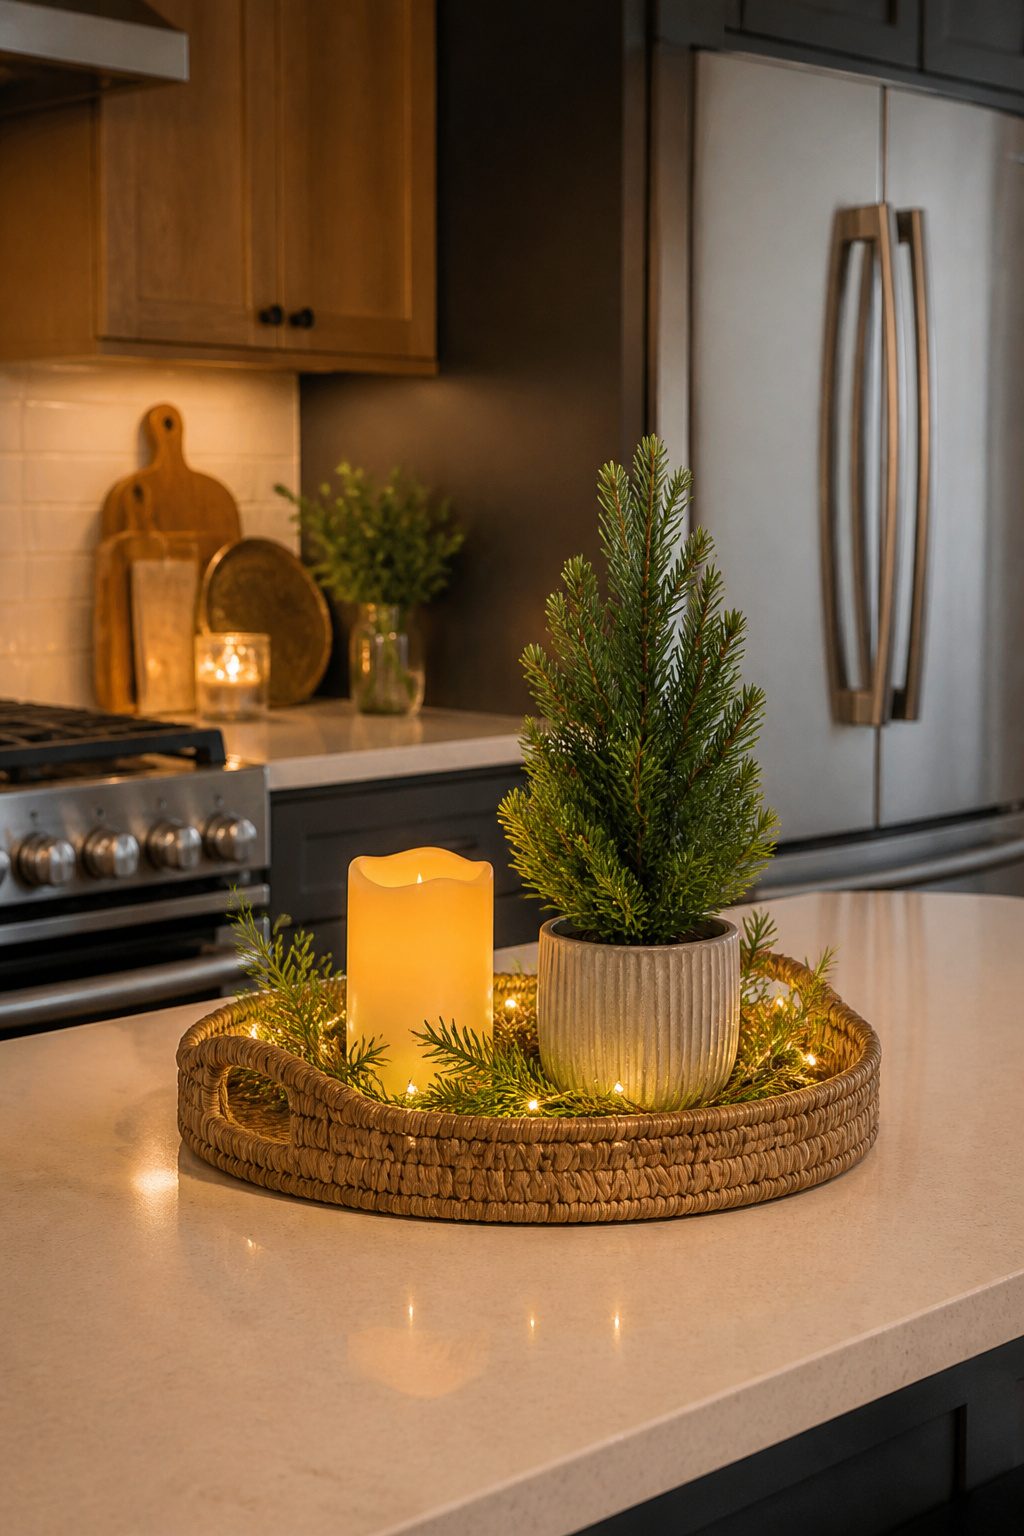
Battery-operated lights have replaced almost every real candle in my kitchen. The exception is a single balsam fir pillar I set on the counter in a tray with matches and a snuffer, never near the window where drafts catch the flame. Everything else, the string lights above the cabinets and the tiny bulbs tucked into the evergreen swag by the sink, run on AA batteries.
What sold me was a flickering LED bulb I found last year. The glow stutters the way a real wick does, low and warm, not the steady flat beam older LEDs gave off. Now the kitchen after dark looks like the room is breathing.
The risk is not worth the look for anything unattended. Draped lights behind the sink stay on all evening while dishes soak. A live flame does not. For renters especially, battery-operated is the safer bet: no melted wax on a countertop you do not own, no scorch marks to explain at move-out.
Frequently Asked Questions
How do I decorate my kitchen for Christmas?
Start with a garland along a window casing or cabinet tops, add a hot cocoa station on a tiered tray, and set out mini trees under nine inches tall. These three elements frame the space without filling every surface. Fresh or flexible faux greenery reads as real; stiff branches look like craft store leftovers.
What are some easy Christmas kitchen decor ideas?
Hang mini wreaths on cabinet doors with small Command hooks, swap in six holiday mugs and a few plates that stack inside everyday dishes, and build a centerpiece from faux cedar and baked pinecones. Each takes under ten minutes to set up and moves aside when you need the space.
How can I make my kitchen festive without clutter?
Keep at least two-thirds of the island clear for real work, change one item per zone instead of the whole zone, and use tiered trays that lift vertically rather than spread sideways. The eye needs somewhere to rest; forced cohesion tips a kitchen from festive to frantic.