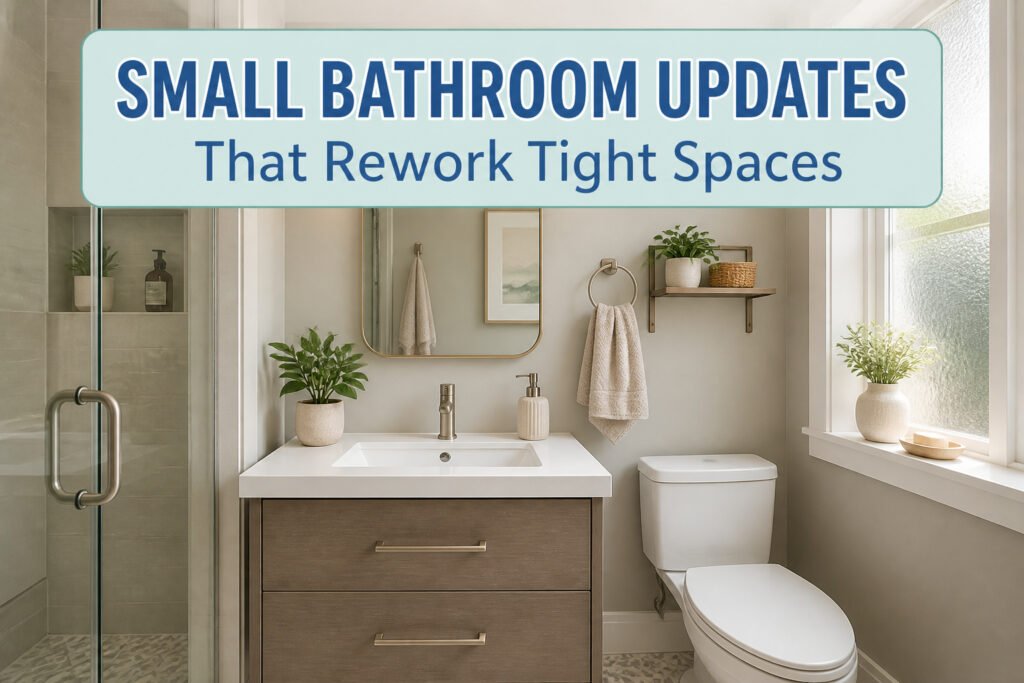
Small bathroom updates run from a $12 adhesive soap dispenser to a full pocket door frame that eats a weekend and half a wall of 1940s plaster. What separates the projects worth doing from the ones you regret is whether you rent or own, and how much of the existing layout you are willing to live with.
1. Soft, Neutral Color Palettes
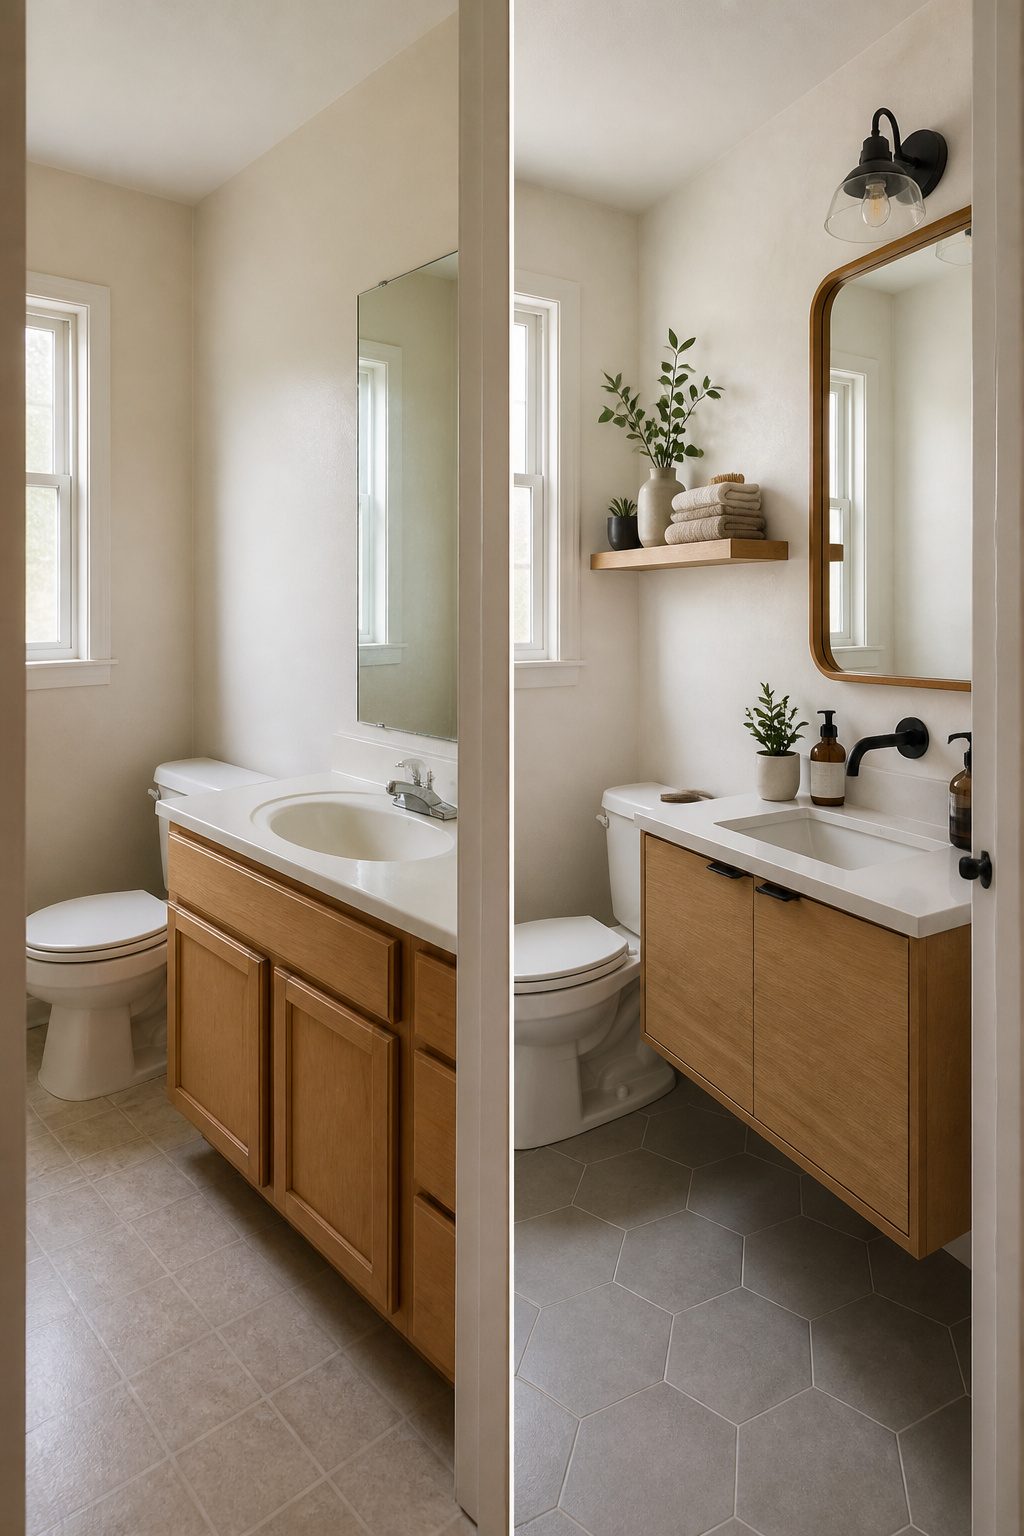
Light colors bounce more light around a room, and in a 5×8 bathroom that extra reflection matters. My own rental came with warm white walls I could not paint, so I worked with what the landlord chose rather than against it. Soft neutrals, white, beige, and soft gray act as a quiet backdrop that lets towels, hardware, or a small plant do the visual work without crowding the eye.
The sources I read while planning this split on one point. Some say keep everything light from floor to ceiling. Others suggest a darker shade below waist level, on baseboards or a vanity, with lighter tones above to make the rest of the space feel brighter. Two ways to play it, and both rely on the same ceiling rule: stick to two or three colors total. More than that, and a small bathroom starts looking like a cabinet of samples. I kept mine to warm white walls, a natural wood tone on the mirror frame, and matte black on the hardware. Three colors, no more, and the room finally felt intentional instead of accidental.
2. Countertop Extension Over the Toilet
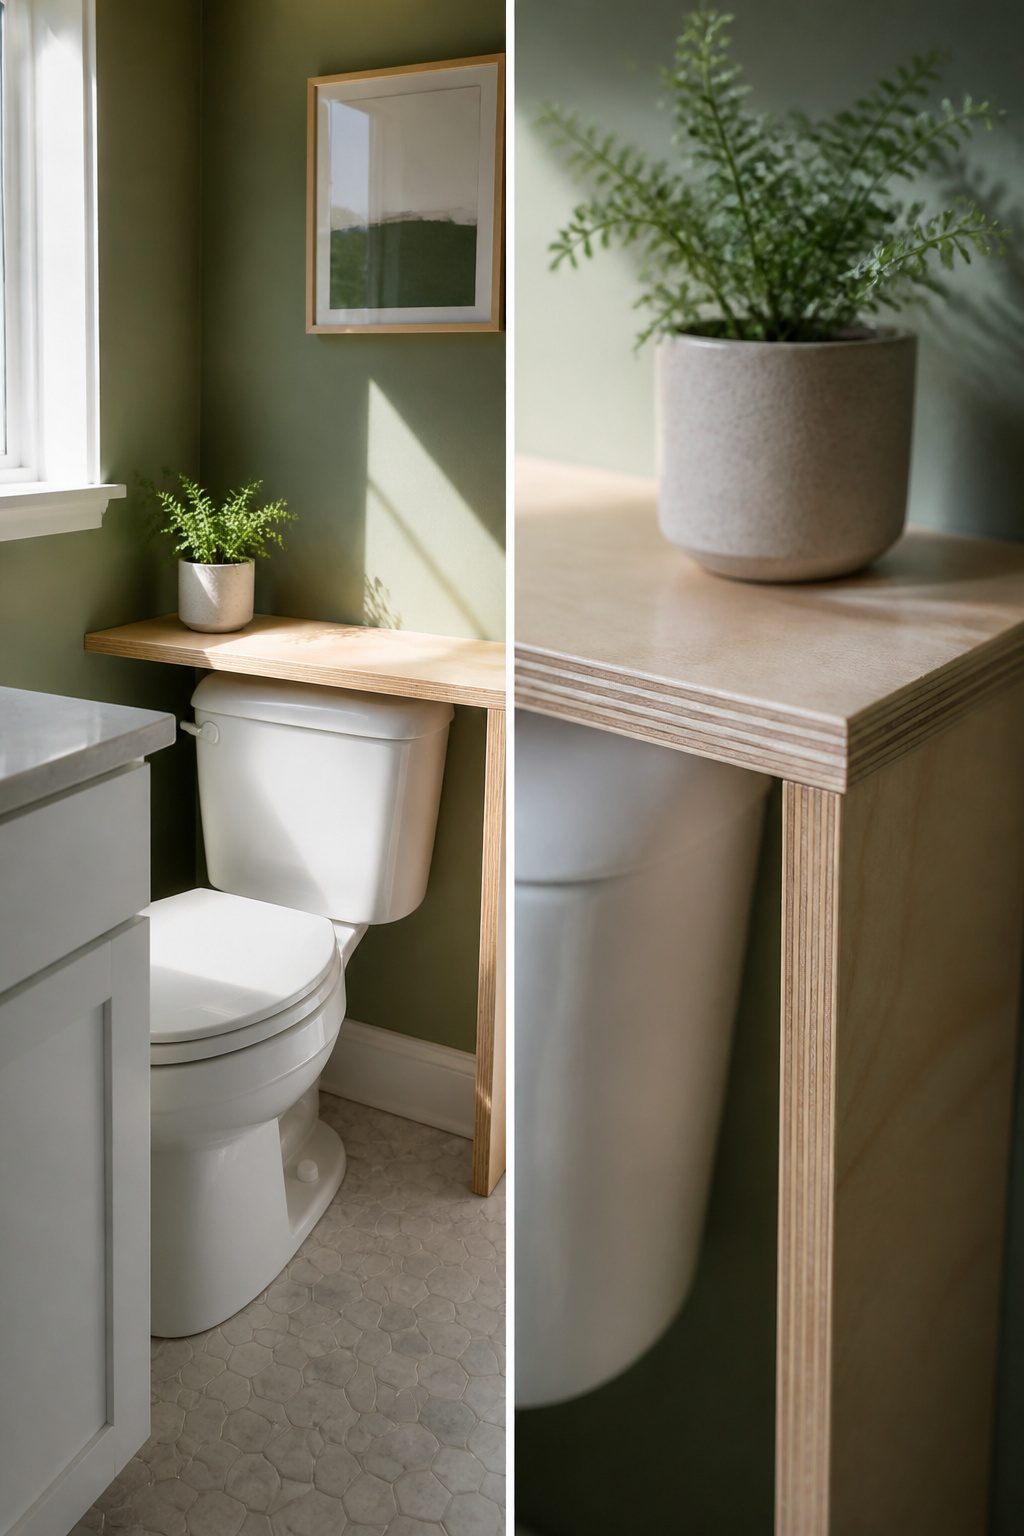
A scrap of plywood across the toilet tank gave me the first real counter space this bathroom ever had for under $80. Measuring meant checking three points: the width between the wall and your elbow when you stand at the sink, the depth from tank front to flush lever, and the height where the lid lifts without scraping wood. My piece is 3/4-inch birch ply finished with three coats of water-based polyurethane. Water pools on it less than you’d think; the front edge drips straight into the bowl, which a freestanding shelf never manages. The shelf wobbles, collects dust underneath, and steals floor space you already do not have. This sits on the tank itself, no feet, no drilling, and lifts off in ten seconds when the flapper needs work. I left mine raw on the underside so moisture can breathe out. One mistake: my first version overhung the flush lever by half an inch. Cut that back, and the whole thing disappears into the room.
3. Sliding Shower Doors
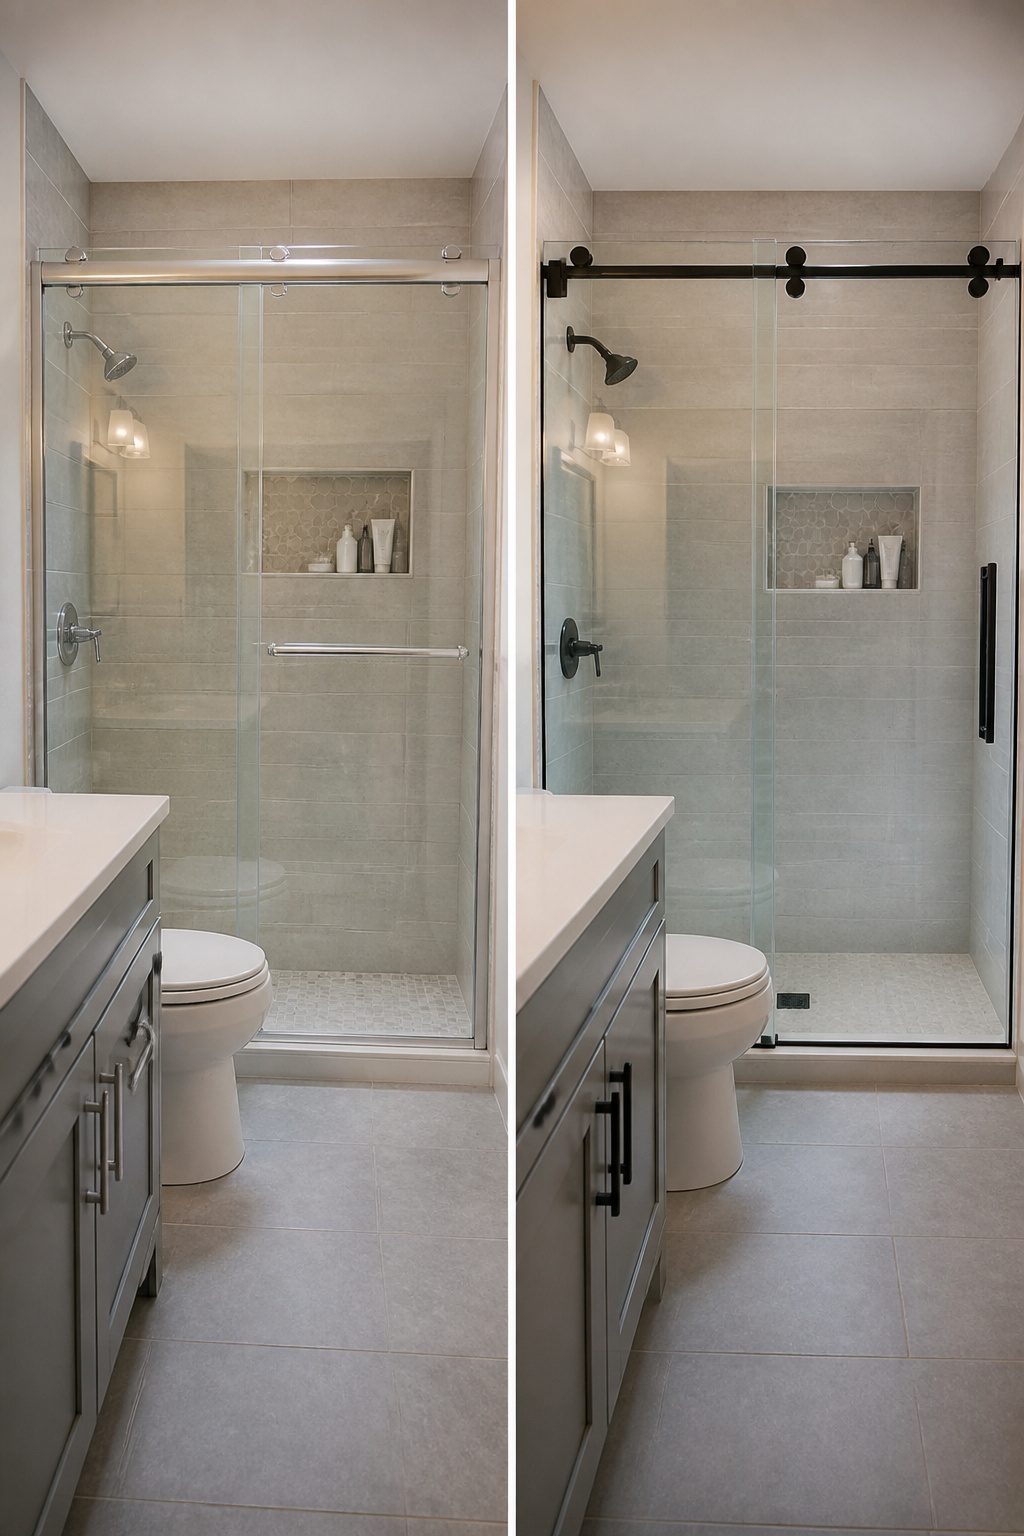
The hinged door in my last rental swung about eight inches into the room and stopped dead against the toilet tank every single time. A sliding door solved it completely, but not all tracks work the same way in a tight footprint.
Top-hung hardware keeps the floor clear, which matters when you are squeezing a squeegee or a scale into the same corner. Bottom-track systems cost less up front, though the rail collects soap scum and needs a brush run through it weekly. I paid roughly $180 for a basic framed slider with a bottom track versus about $340 for a frameless top-hung kit at the same big-box store.
The inch that actually mattered was the overlap: the fixed panel has to sit far enough past the shower curb that the rolling panel seals against it without leaving a gap. Half an inch short and you get spray on the tile every morning. I measured the curb width three times, bought the door that listed a one-inch overlap past my dimension, and stayed dry.
4. Layered Lighting
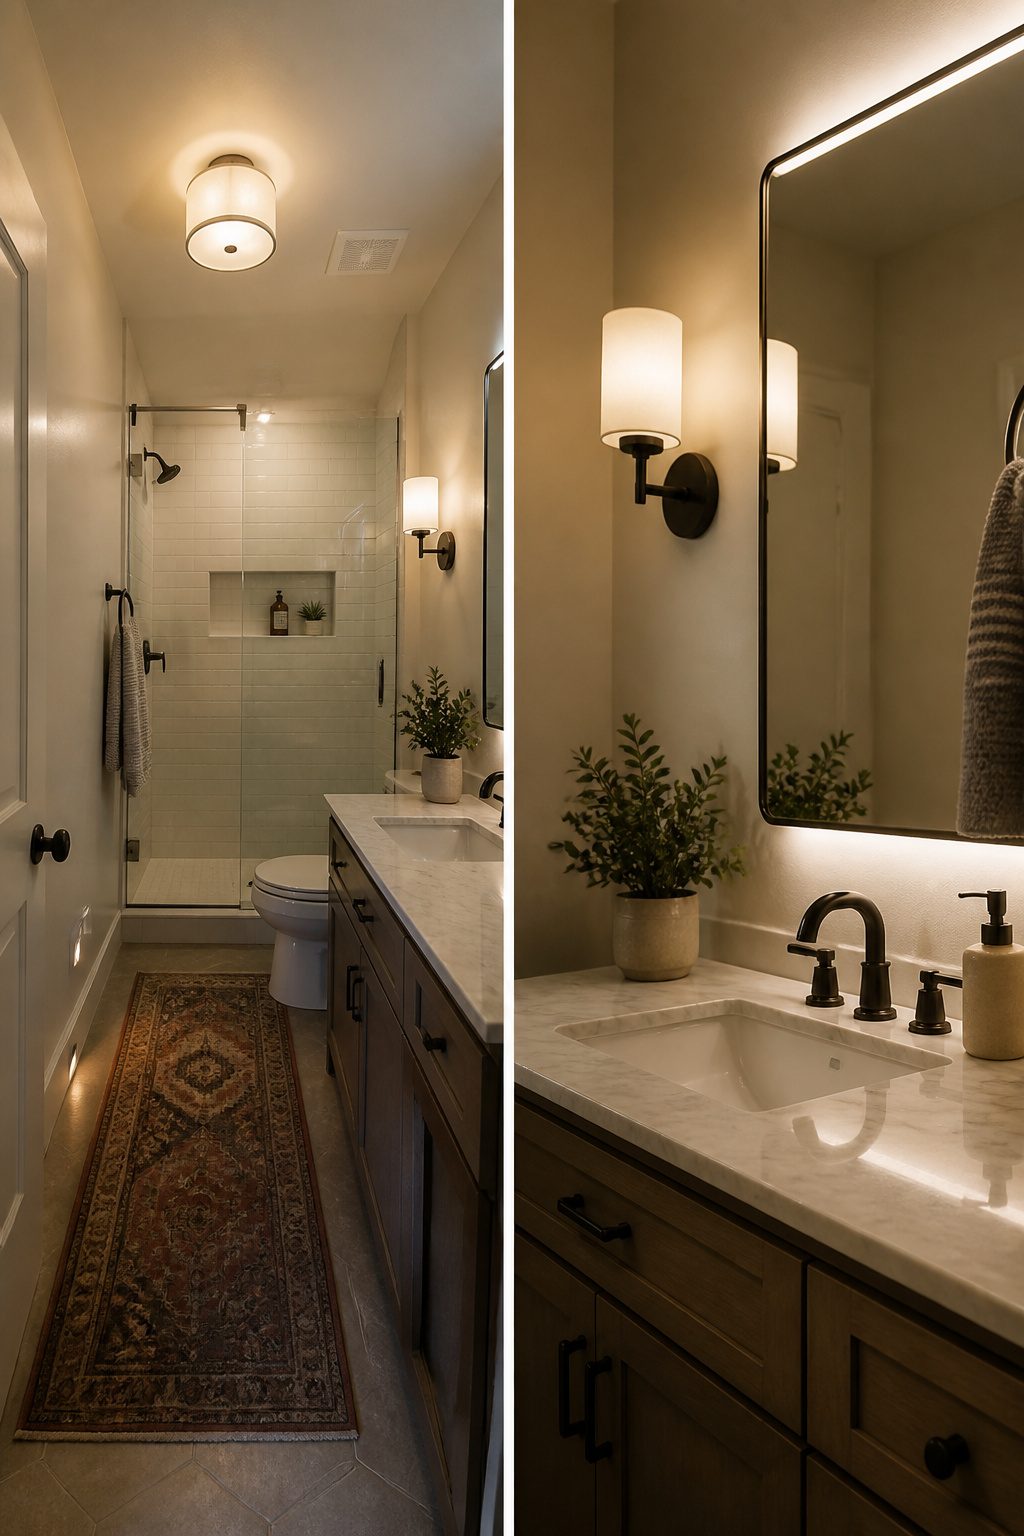
The ceiling fixture in my old bathroom put out enough light to find the sink, but that was the end of its talents. Shadows pooled under my eyes every morning, and a midnight trip meant either blinding myself or guessing where the toilet was.
Three light sources replace one when you break the job apart: a strip LED over the mirror, the existing overhead on a dimmer, and a small night-light outlet in the baseboard. The LED bar cost $22, needed two wire nuts and half an hour with the breaker off. The dimmer switch was another $14. Wiring the LED myself meant reading the diagram twice, then checking with a non-contact tester before I touched anything copper.
The real test comes at 2 a.m. That first night, I twisted the dimmer to its lowest click and found the bowl without squinting or stumbling. The LED stayed off, the night-light held its ground, and I understood why designers call layered lighting a necessity rather than a luxury. Total spend sat under $40. The only mistake was buying a daylight-temperature LED at first, 5000K, which made the small room feel like a clinic. Swapped it for 3000K the next week.
5. Recessed Shelves and Cabinets
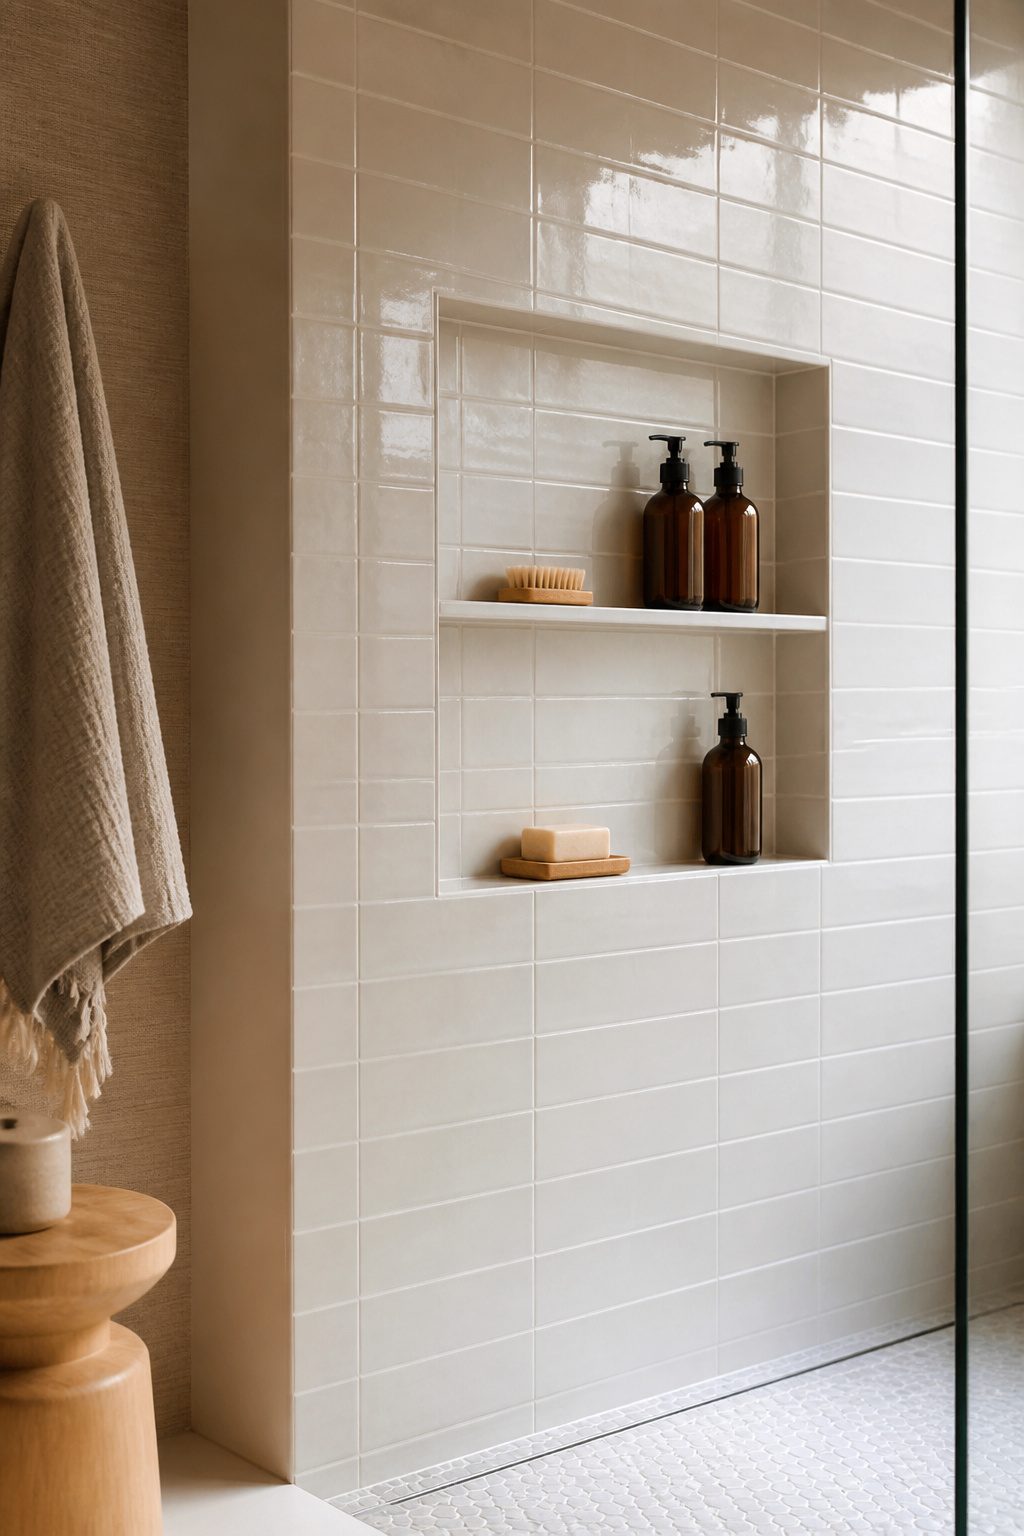
Recessed shampoo shelves sit flush with the wall plane, which matters in a shower where six inches of protrusion turns a narrow space into a shoulder-bumping obstacle. The standard wall cavity between 2×4 studs gives you roughly 3.5 inches of depth, enough for most bottles laid flat or a stack of washcloths. I cut into the wall expecting that depth everywhere and hit a surprise: one bay carried a vent stack, another had electrical running diagonal between boxes. That second shelf I had sketched on paper never made it past the stud finder.
The single shelf I finished holds more than I expected. Shampoo, conditioner, and a bar of soap fit without crowding, and the lack of a second tier keeps the visual field open in a space that already fights claustrophobia. For a tub surround replacement, built-in nooks integrated into the wall system solve the stud-hunting problem entirely, though that locks you into a full renovation rather than a weekend cut-and-patch.
The usable depth between studs is about 3.5 inches, and that assumes nothing else lives in the wall. A stud finder helps, but only opening the drywall reveals the full story. I stopped at one shelf because the second location carried a surprise I could not reroute without an electrician and a permit.
6. Wall-Mounted Vanities
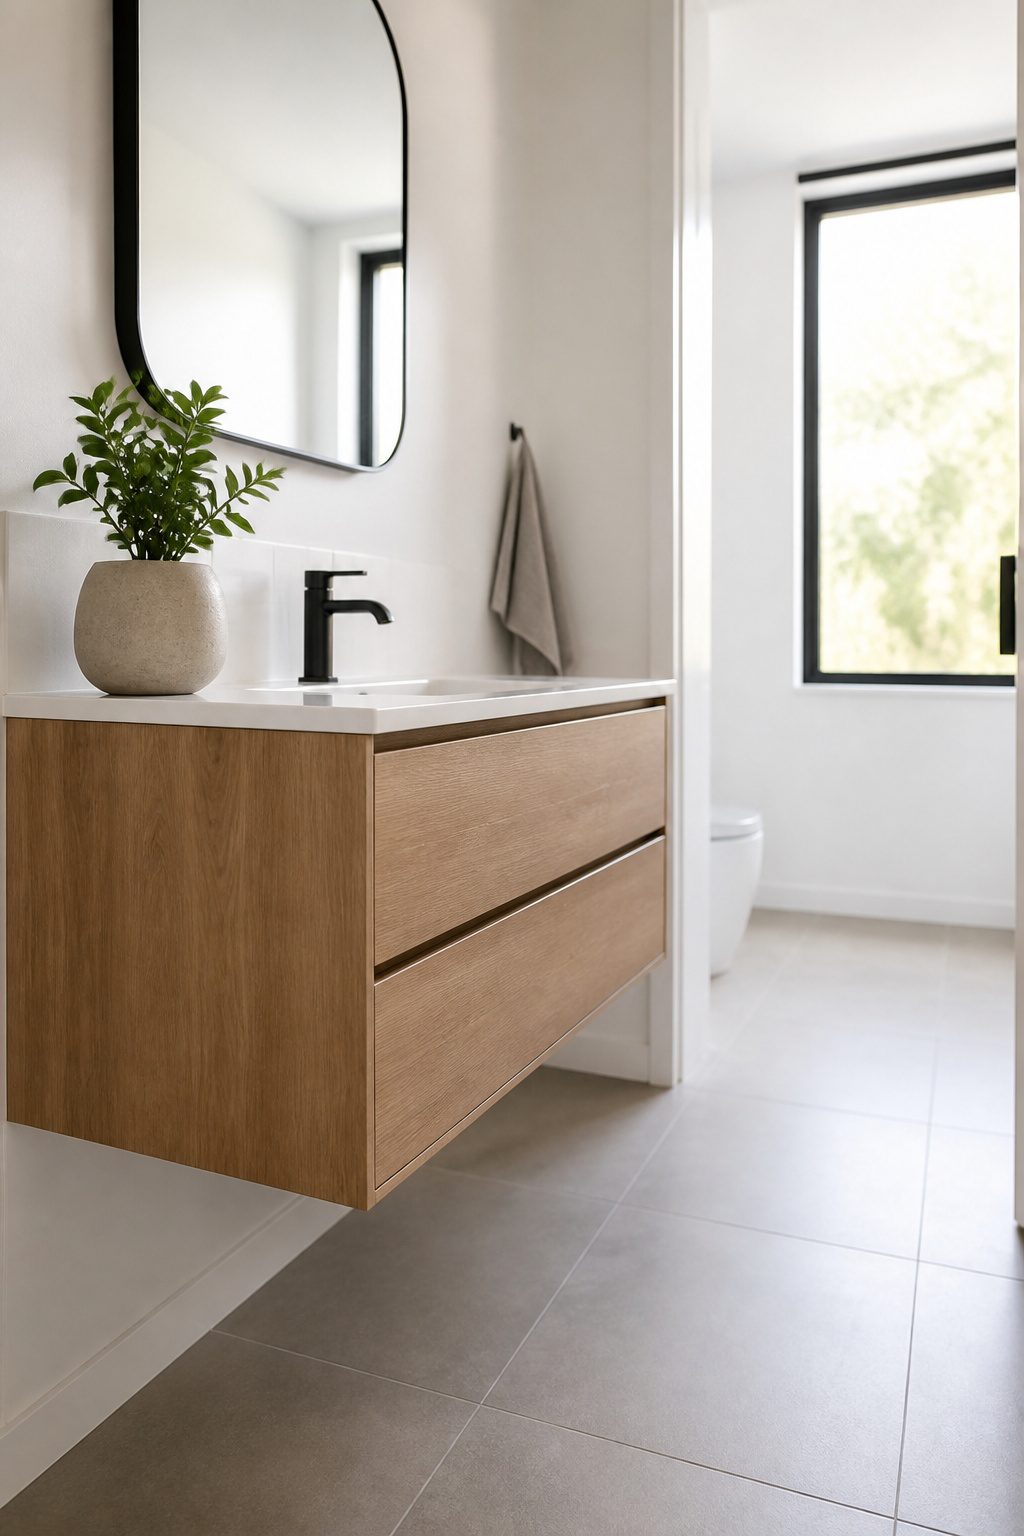
Wall-mounted vanities trade a cabinet box for breathing room. The floor stays open from the wall to roughly where your toes go, which in a 5 by 8 foot bath is the difference between shimmying past the door and simply walking in.
I paid $499 for a 24-inch floating model, then spent another afternoon moving the drain and water supply out of the floor and into the wall. That plumbing shift is non-negotiable unless you get lucky with existing placement, and it adds labor or contractor time most guides skip past. The Kohler Jute line starts at $1,498.99 if you want the matching wall-hung cabinet, but the entry-level piece I found works fine with a separate top.
The catch is what gathers underneath. Dust, hair, and the occasional dropped cotton ball collect in that open zone where a toe kick used to hide them. A quick sweep with a long-handled duster fixes it, but it is a weekly task, not a monthly one. For the floor space gained, the tradeoff still leans toward doing it, especially if you pair the vanity with a wall-hung toilet and keep the whole floor plane clear.
7. Large-Format Tiles
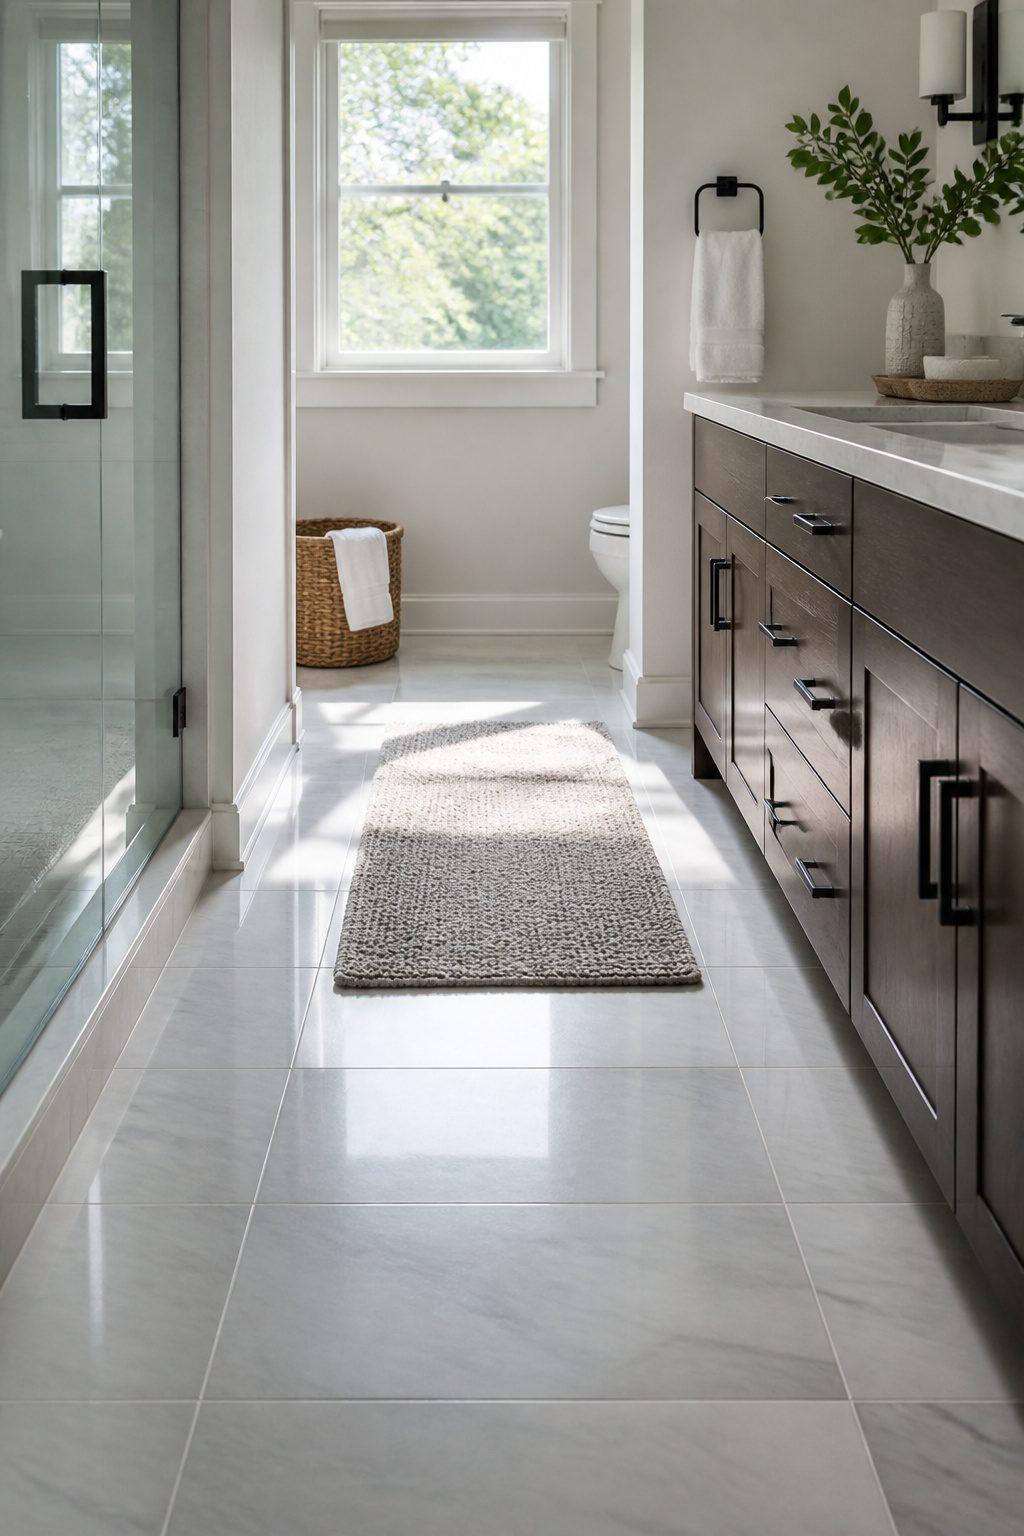
A 12×24 tile on the floor of a 160-square-foot bathroom changes the geometry of the room more than the color does. The larger face cuts grout lines roughly in half against the old 12×12 standard, and the eye reads that uninterrupted surface as more square footage than you actually own.
I laid my first 12×24 floor thinking the size alone would do the work. It does not. These tiles are thin enough to cup, and a subfloor with even minor highs telegraphs as lippage at every edge. I spent an afternoon with a straightedge and a bag of self-leveler before the mortar went down, and that hour was the difference between a floor that reads seamless and one that catches your toe.
Running the tile long-ways toward the far wall stretches the rectangle. Running it across does the opposite, and in a 160-square-foot box that choice is the whole effect.
8. One Large Mirror
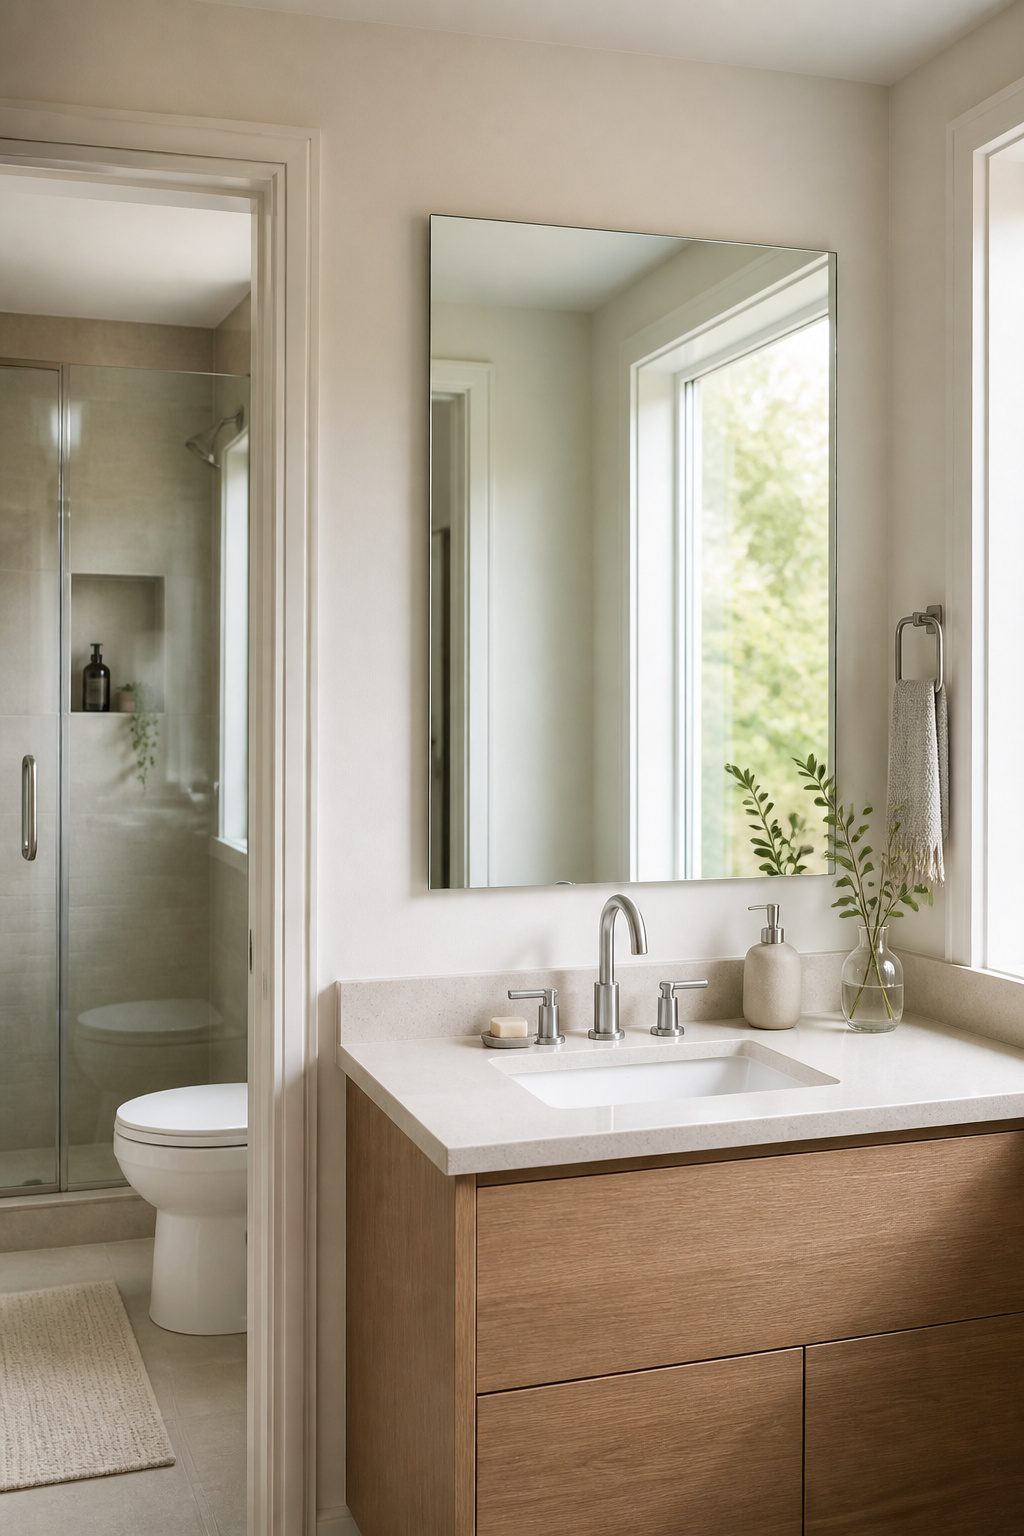
The medicine cabinet in my rental bathroom was the standard 24-inch recessed box with a fogged mirror and a door that never quite latched. Replacing it with a 36-inch frameless mirror cost $89 and about twenty minutes, most of which was waiting for the adhesive to skin over. I used a tube of Loctite Power Grab that ran $14 at the hardware store; the mirror has held for fourteen months through two humid summers without a bracket or anchor in the drywall.
What I gained was light. The old cabinet sat above a single sconce and swallowed half the bounce. The wider mirror catches the window light from the side and throws it back across the narrow room so the far wall actually registers in the mirror instead of disappearing into shadow. The space reads larger because you see more space, not because the room itself changed.
What I lost was storage. The cabinet held a bottle of ibuprofen, a razor, and a small stack of bandages. Those now live in a drawer, and the counter stays clearer than it did when I had the "convenience" of hiding clutter behind glass. For a bathroom with even a single drawer, the trade is worth it. Without one, a wall-mounted basket or a slim shelf above the door handles the overflow.
9. Minimal Decor
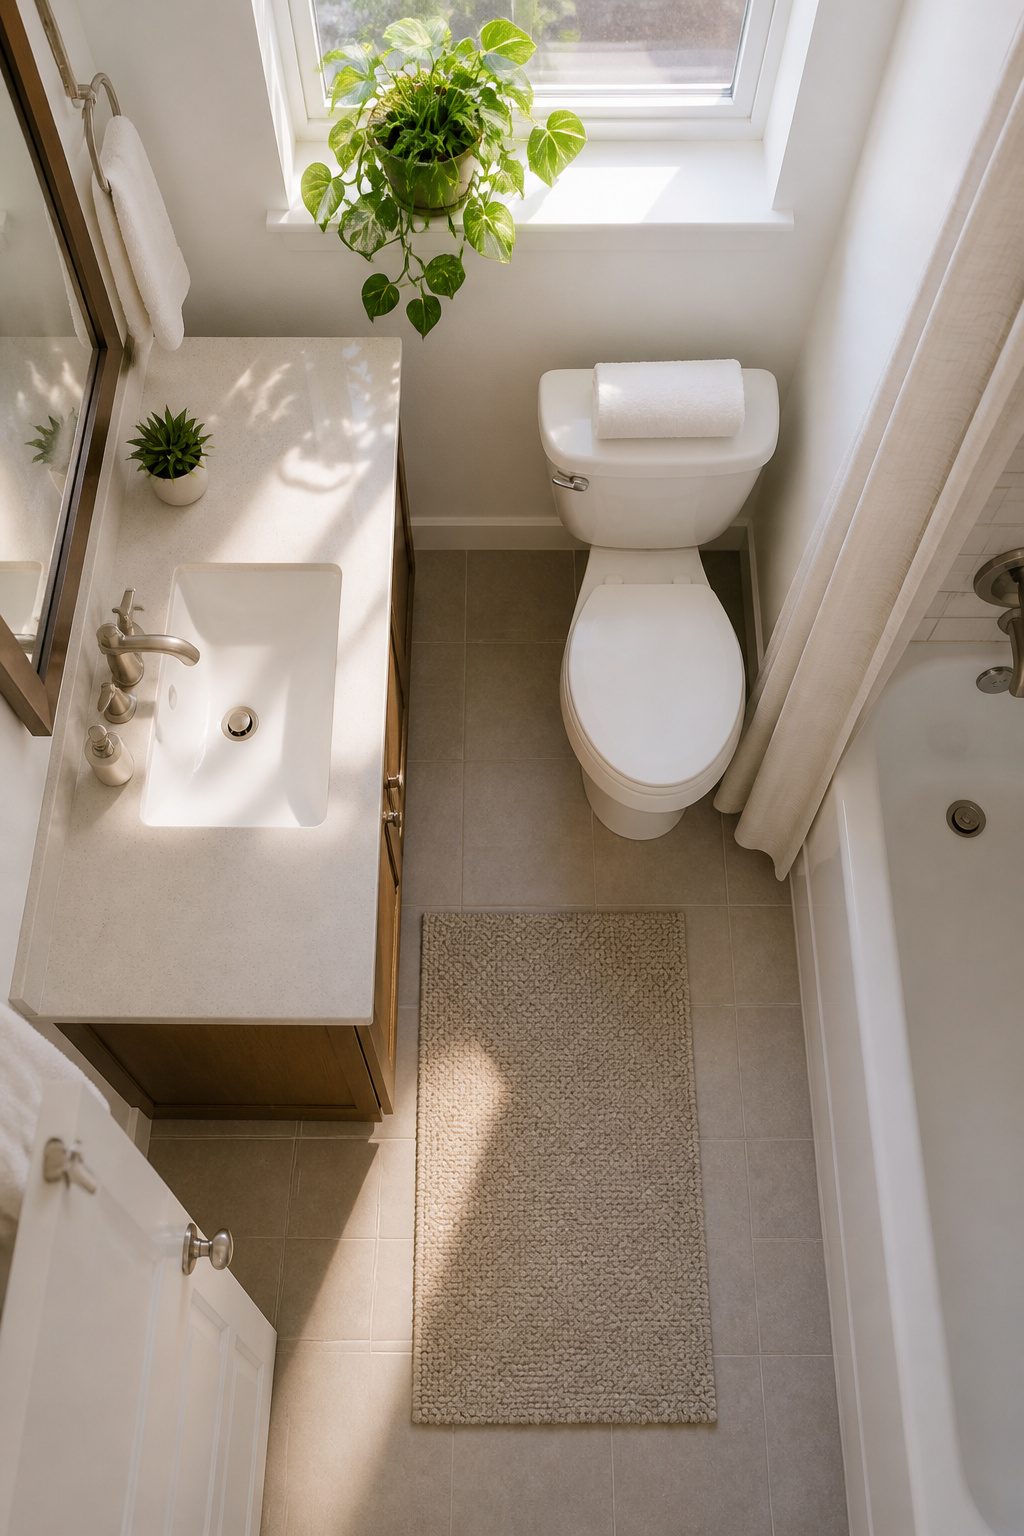
The ceramic vase went first, then the three glass jars I kept cotton balls in, then the woven tray that held nothing but a candle I never lit. Counter space in a small bathroom is a trade you make once, and I chose wrong for two years. Now the only living thing in there is a pothos on the windowsill, the one plant that has not minded the humidity spikes and the weak winter light. Everything else left and stayed gone.
The towel rule I follow now is one in use, one in wash, one spare folded on the tank. No stacks, no decorative rolls in a wire basket that collects dust. A clear counter reads as square footage you do not actually have. The eye stops on objects, and in a room measured in inches, that pause costs you. I learned this the morning I set a hair tool down and realized I had nowhere left to put my elbows.
10. Custom Cabinetry Fit to the Wall
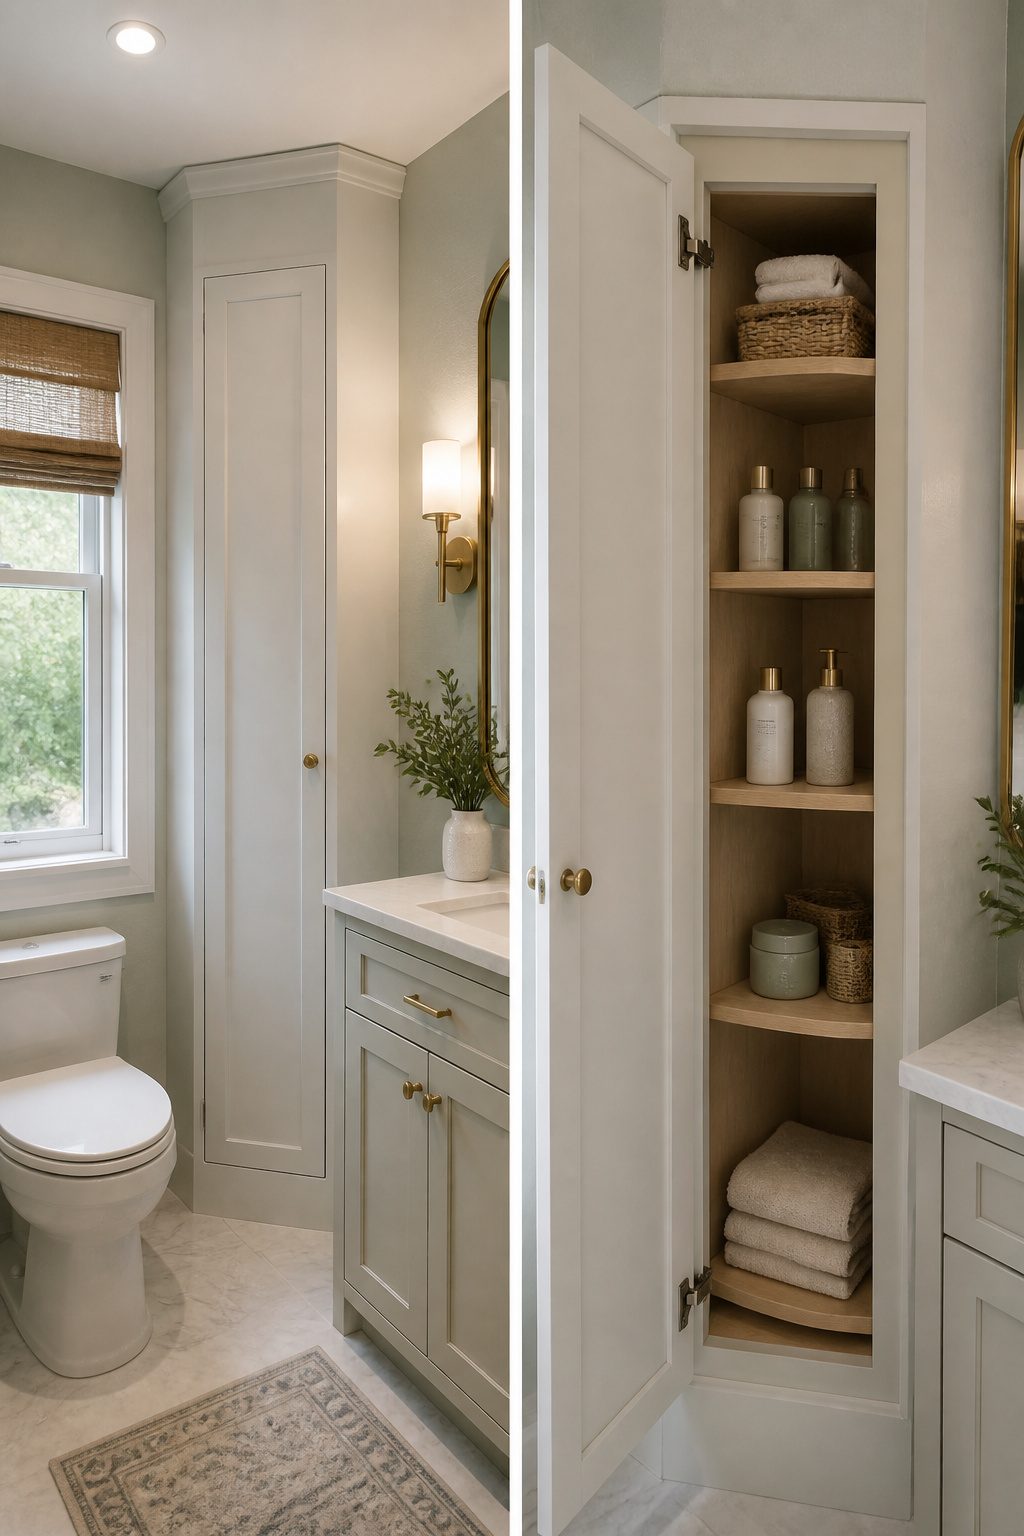
The dead corner behind my bathroom door had four inches of bare wall that no stock cabinet would touch. Standard depths start at twelve inches, and even the "narrow" bath lines I found ran nine. That gap was enough for a toilet paper tower, a soap stash, and nothing else.
I built a six-inch deep cabinet from three 1×6 pine boards from Home Depot and a half-sheet of ¼-inch plywood. The boards were cheap, but the cut was where I fumbled. I measured the wall width at the base and cut the shelf to match, forgetting that drywall corners are never square. The top of my shelf caught by nearly three-eighths of an inch. Measure top, middle, and bottom, and cut to the smallest number. I had to shave the back edge with a jigsaw after the glue dried, which left a gap I filled with caulk and self-deprecation.
A piano hinge on the left and a magnetic catch on the right turned it into a shallow medicine cabinet. The face frame is just 1×2 poplar, painted to match the trim, and the whole thing reads as original if you don’t look too close at my corner.
11. Pocket Door Replacement
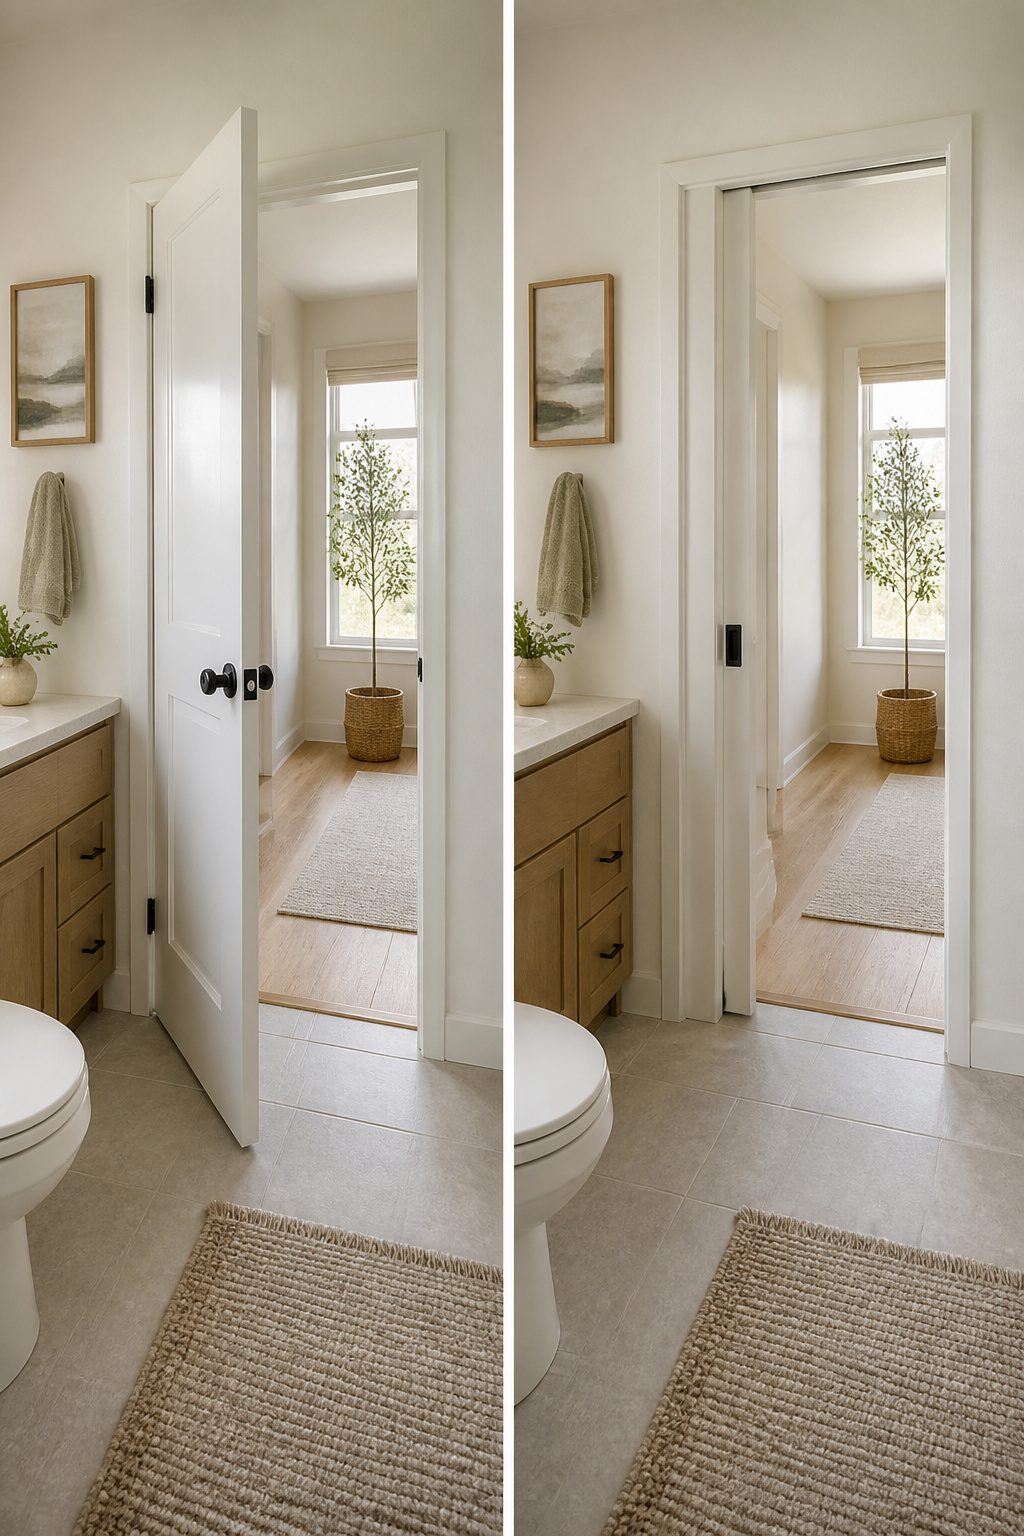
A swing door in a small bathroom eats about nine square feet of usable floor because the arc needs to stay clear. That was the math that pushed me to pull one out and try a pocket frame instead. The wall was plaster over lath, built in the late 1940s, and it gave up more than I expected. Two studs came out, a section of top plate needed reconfiguring, and the plaster on both sides crumbled far past the rough opening. What looked like a Saturday demolition became a Sunday of wire mesh, setting-type compound, and feathering edges that still telegraphed through the primer six months later.
The pocket frame itself went in square and smooth; the hardware is forgiving if you read the instructions twice before you cut anything. Plaster repair after a pocket install runs deeper than drywall, though, because the disturbance travels in ways you cannot predict until you open the cavity. In a rental, this project sits on a line I would not cross again. The structural change is reversible only with a full rebuild of that wall section, and most leases treat stud removal as beyond the scope of "ordinary wear and tear." If you own the place and the bathroom is tight enough that every inch of floor matters, the trade is worth it. If you are renting, a surface-mounted sliding barn door on the existing header gives back nearly the same floor space without asking the wall to give up its bones.
12. Heated Floor Mats
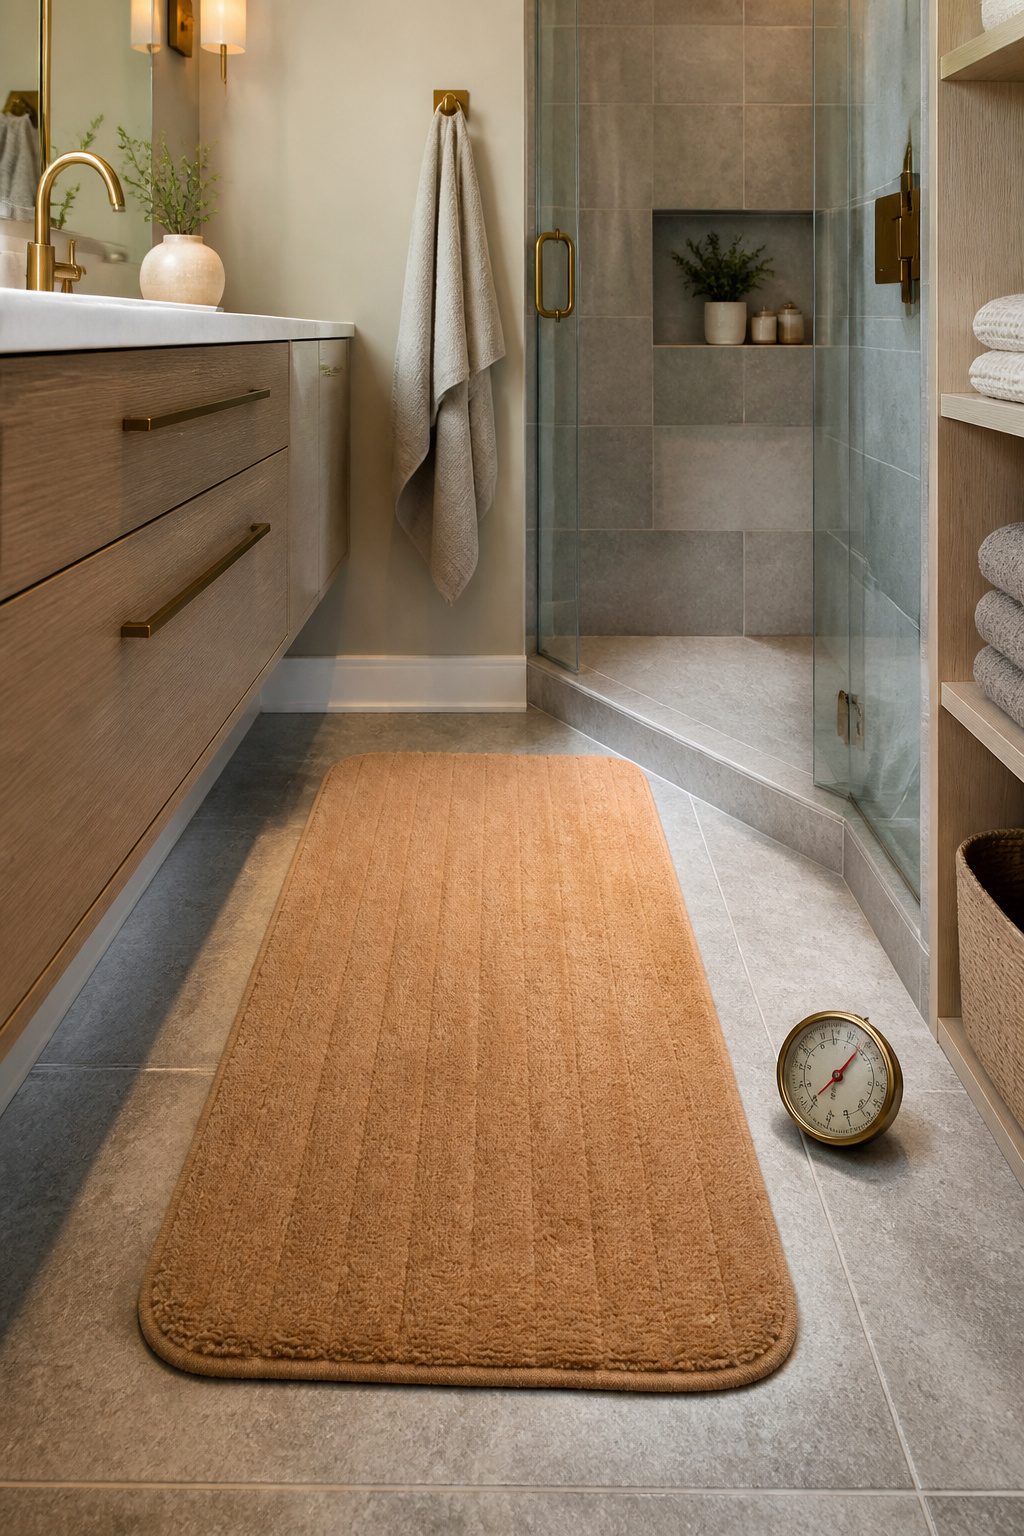
The full heated floor system I priced out ran about twelve watts per square foot and needed its own circuit, which put the job well past a weekend. The mat I actually bought pulls 90 watts and covers four square feet, just enough to stand on between the sink and the shower. It plugs into the existing GFCI outlet where the hair dryer lives, so no electrician and no permit.
January morning at 6 a.m., the tile still reads 58 degrees on the wall thermometer but the mat is up to 82. The difference between dreading that first foot down and not thinking about it at all is maybe $120 and a strip of double-sided tape. The tape is the part I would do differently; two corners have curled in fourteen months of steam, and the mat shifts slightly when I step off-center. A bead of silicone underneath would have saved the fuss.
13. One Bold Wall
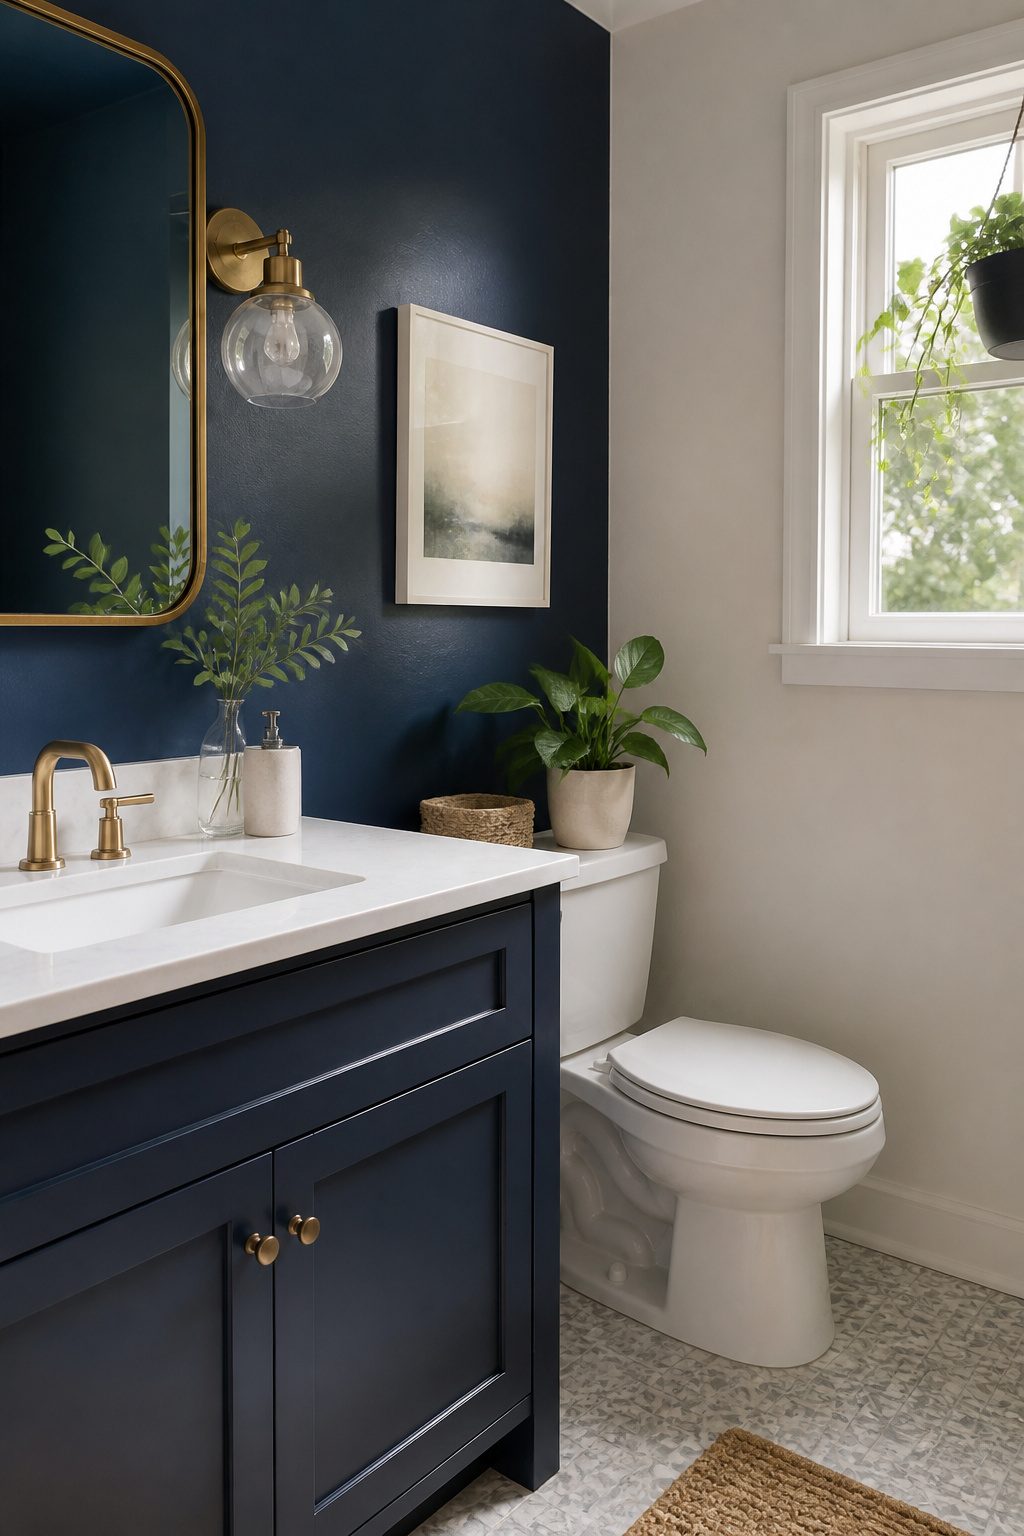
Navy blue reads darker on a wall than it does on a chip, something I learned after brushing three samples behind the toilet in my five-by-eight-foot bathroom. The first looked almost black once dry. The second carried too much green. The third, a true navy, stayed rich without swallowing the light from the single window.
One wall is the limit. I painted only the wall the toilet sits against, stopping at the corner seams so the color never wrapped around. The other three walls stayed a soft white, which let the navy act as a focal point rather than closing the room in. In a tight space, a bold color on every surface becomes a box; on one surface, it becomes architecture.
The contrast against the lighter tones keeps the room feeling modern and intentional, not like a cave. A patterned floor or textured wallpaper could play the same role, but paint costs less and takes a Saturday, not a second weekend.
14. Vertical Storage Racks
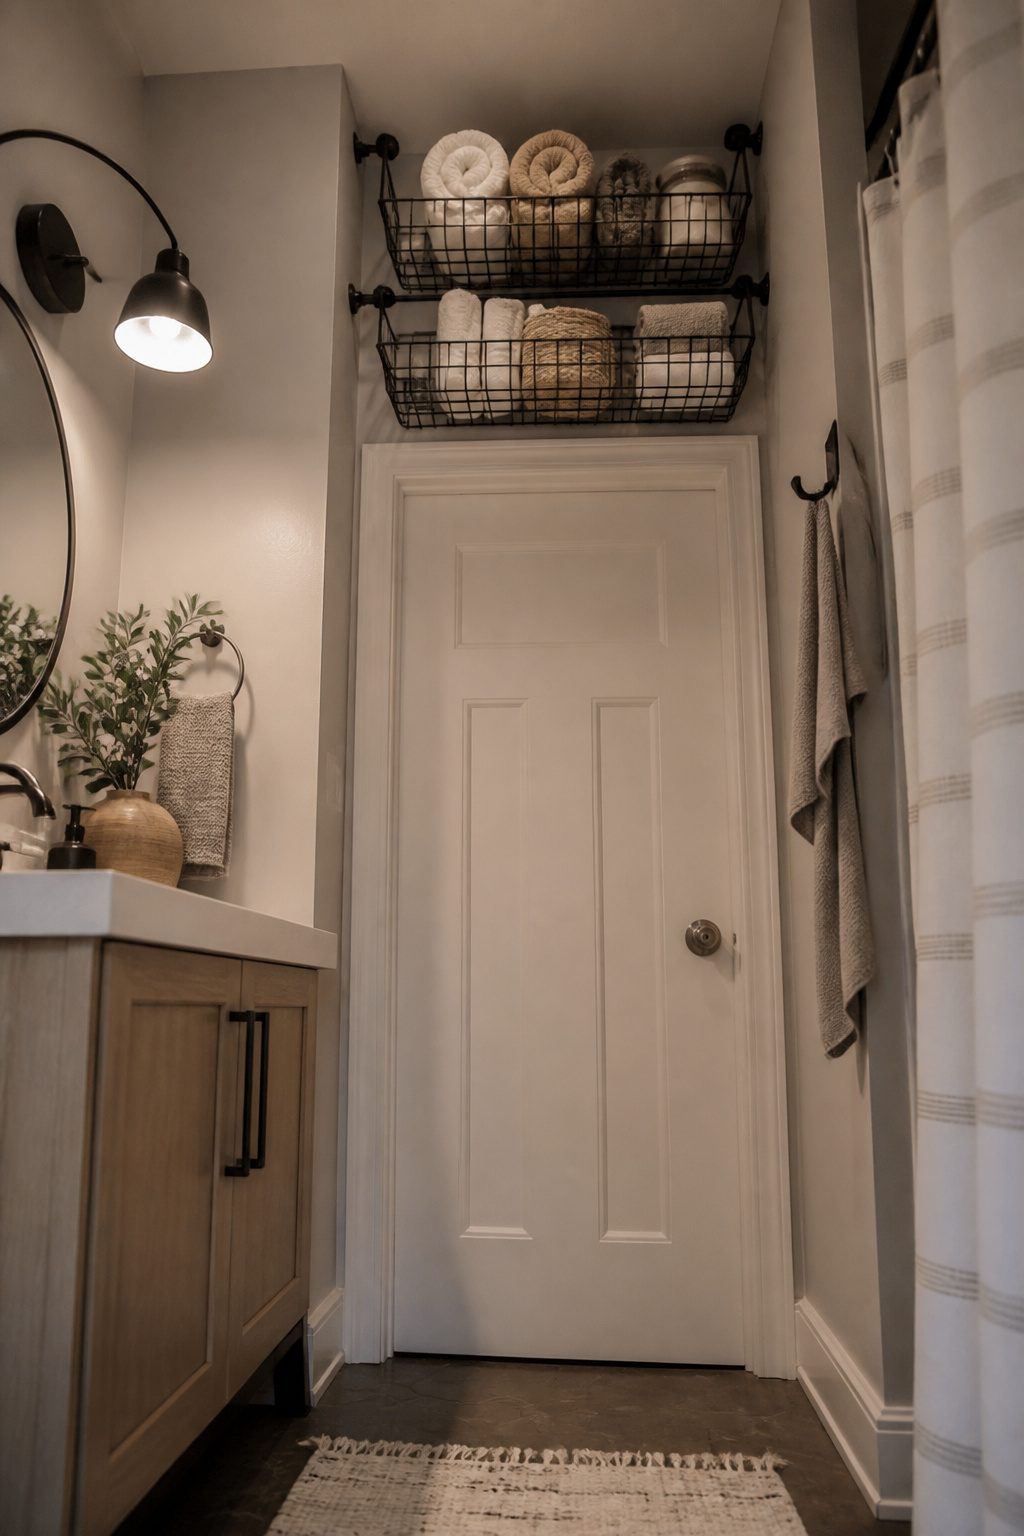
The 66-inch tension rod I mounted above the door holds three spare towel sets and a stack of washcloths in wire baskets. That height keeps everyday linens in rotation without the visual weight of a full linen tower, and the rod itself cost less than a single cabinet pull. Floor-to-ceiling storage reads as architecture; wall-to-wall reads as clutter. The difference is that vertical line breaking the horizontal planes of tile and paint.
One basket came down the first week. The tile ledge I had trusted for backup support was sloped for drainage, not flat for resting, and the basket slid on condensation. A small cork pad underneath fixed it, but now I check any "flat" bathroom surface with a level before trusting it with weight.
Above-door dead space is usually 12 to 18 inches of empty stud bay. A tension rod keeps it rental-friendly, and the height makes a low ceiling feel intentional rather than cramped. Wall-mounted vanities and recessed shower niches use the same vertical logic for different jobs, but the door frame is the one spot almost every bathroom has going unused.
15. Functional Accessories
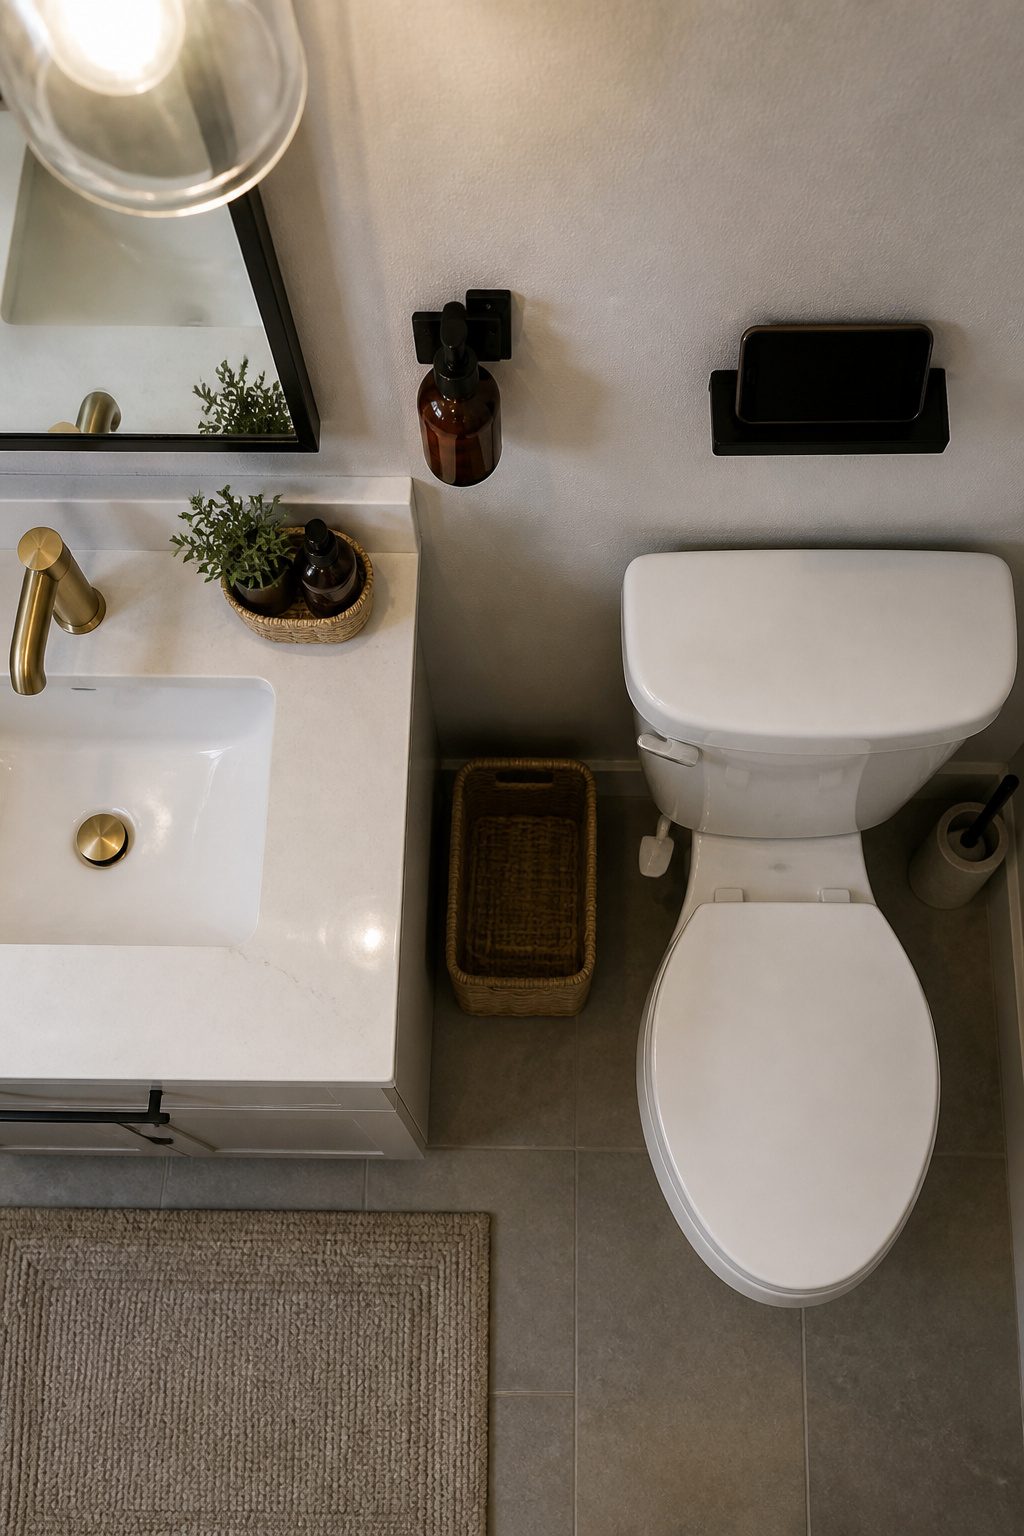
The soap dispenser that finally got my countertop back was a $12 pump that mounts to the wall with adhesive strips. Two weeks after I put it up, the original bottle of Method soap was still running, and the corner of the sink where the bottle used to live had stayed dry enough that the caulk line stopped going black. That alone was worth the trip to the hardware store.
I laughed at the toilet paper holder with the phone shelf when I first saw it online. It looked like a solution to a problem nobody had. Then I spent a weekend with a sinus infection, parked on the toilet with my phone balanced on the toilet paper roll, and bought one that Monday. The shelf is just wide enough for a phone and nothing else, which turns out to be the right restraint. It screws into the standard holder holes, so the swap took five minutes.
The real find was an $8 wire basket that hooks over the tank. I bought it for spare rolls, but it holds the spray bottle and the toilet brush in a caddy I can lift out when company comes. No drilling, no adhesive, no marks when I move. The powder room went from needing a floor rack to needing nothing on the floor at all.
What $3,000 to $15,000 Actually Buys
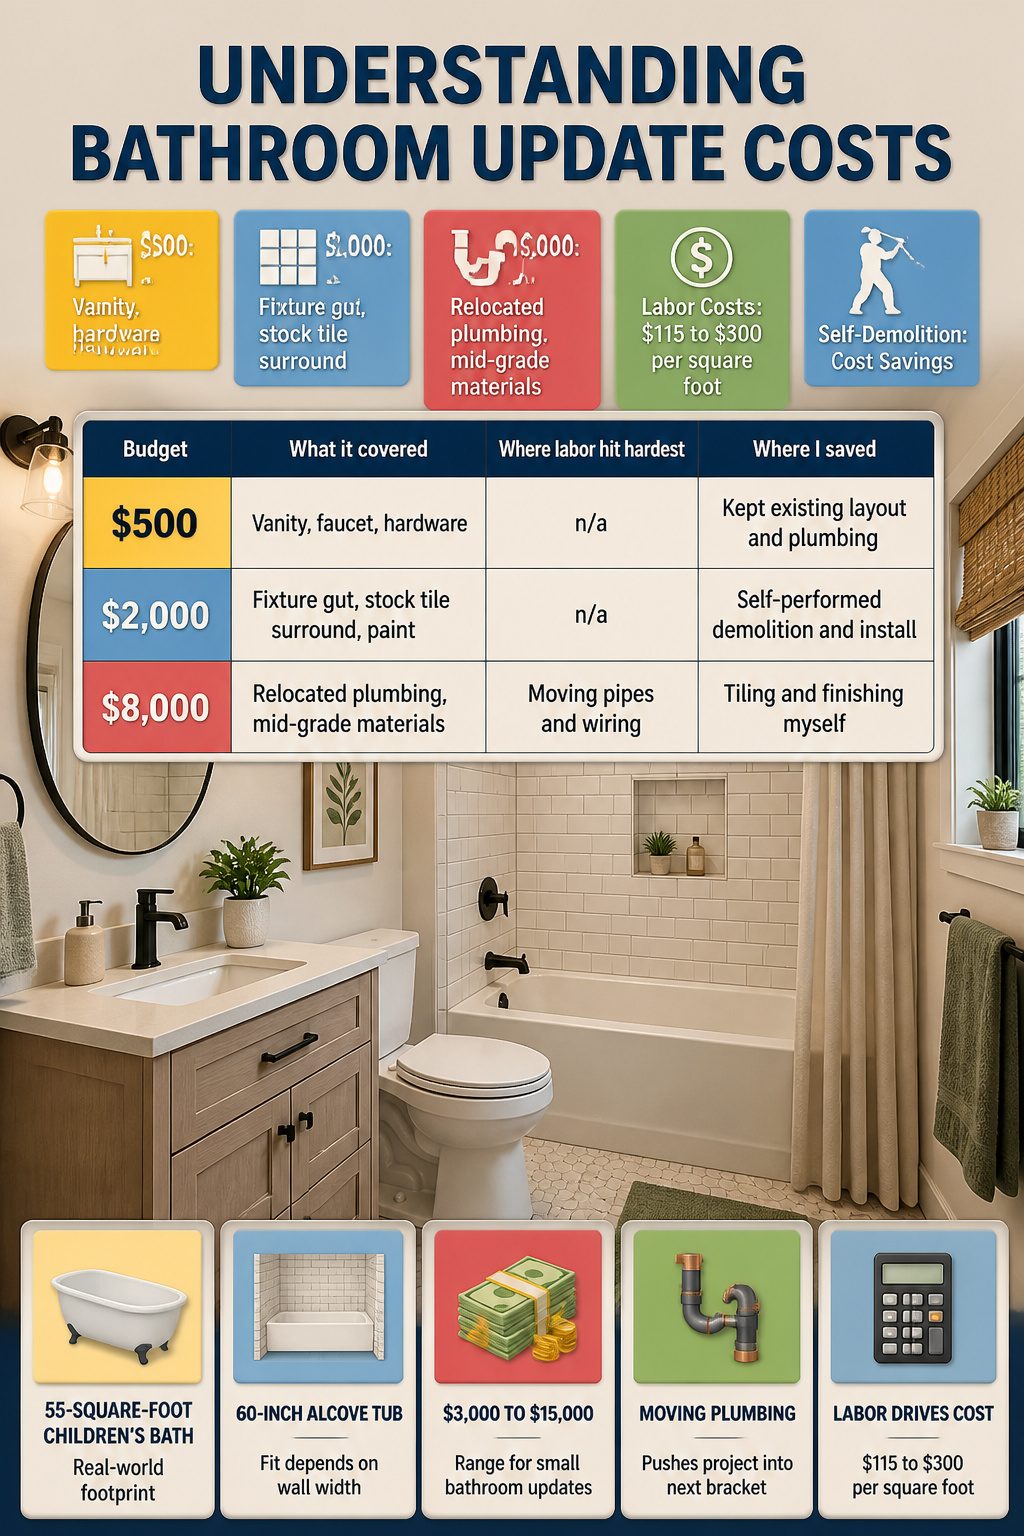
The $3,000 to $15,000 range for small bathroom updates only makes sense once you split it into what actually happened on the ground. In my own projects, $500 bought a vanity swap and new hardware on existing holes; $2,000 covered a full gut of fixtures, a stock tile surround, and a weekend of my own labor; $8,000 was the number where I paid someone else to move plumbing and still had to settle for mid-grade materials. Labor is where the money disappears. The rates I checked against ran $115 to $300 per square foot, and every time I stayed under that mark, I was either doing the demolition myself or living with pipes exactly where they already were.
| Budget | What it covered | Where labor hit hardest | Where I saved |
|---|---|---|---|
| $500 | Vanity, faucet, hardware | n/a | Kept existing layout and plumbing |
| $2,000 | Fixture gut, stock tile surround, paint | n/a | Self-performed demolition and install |
| $8,000 | Relocated plumbing, mid-grade materials | Moving pipes and wiring | Tiling and finishing myself |
The 55-square-foot children’s bath I studied put the rule in perspective: a 60-inch alcove tub fit only because the wall width allowed it, and anything beyond that footprint would have pushed the project into the next bracket entirely.
Rentals Versus Owned
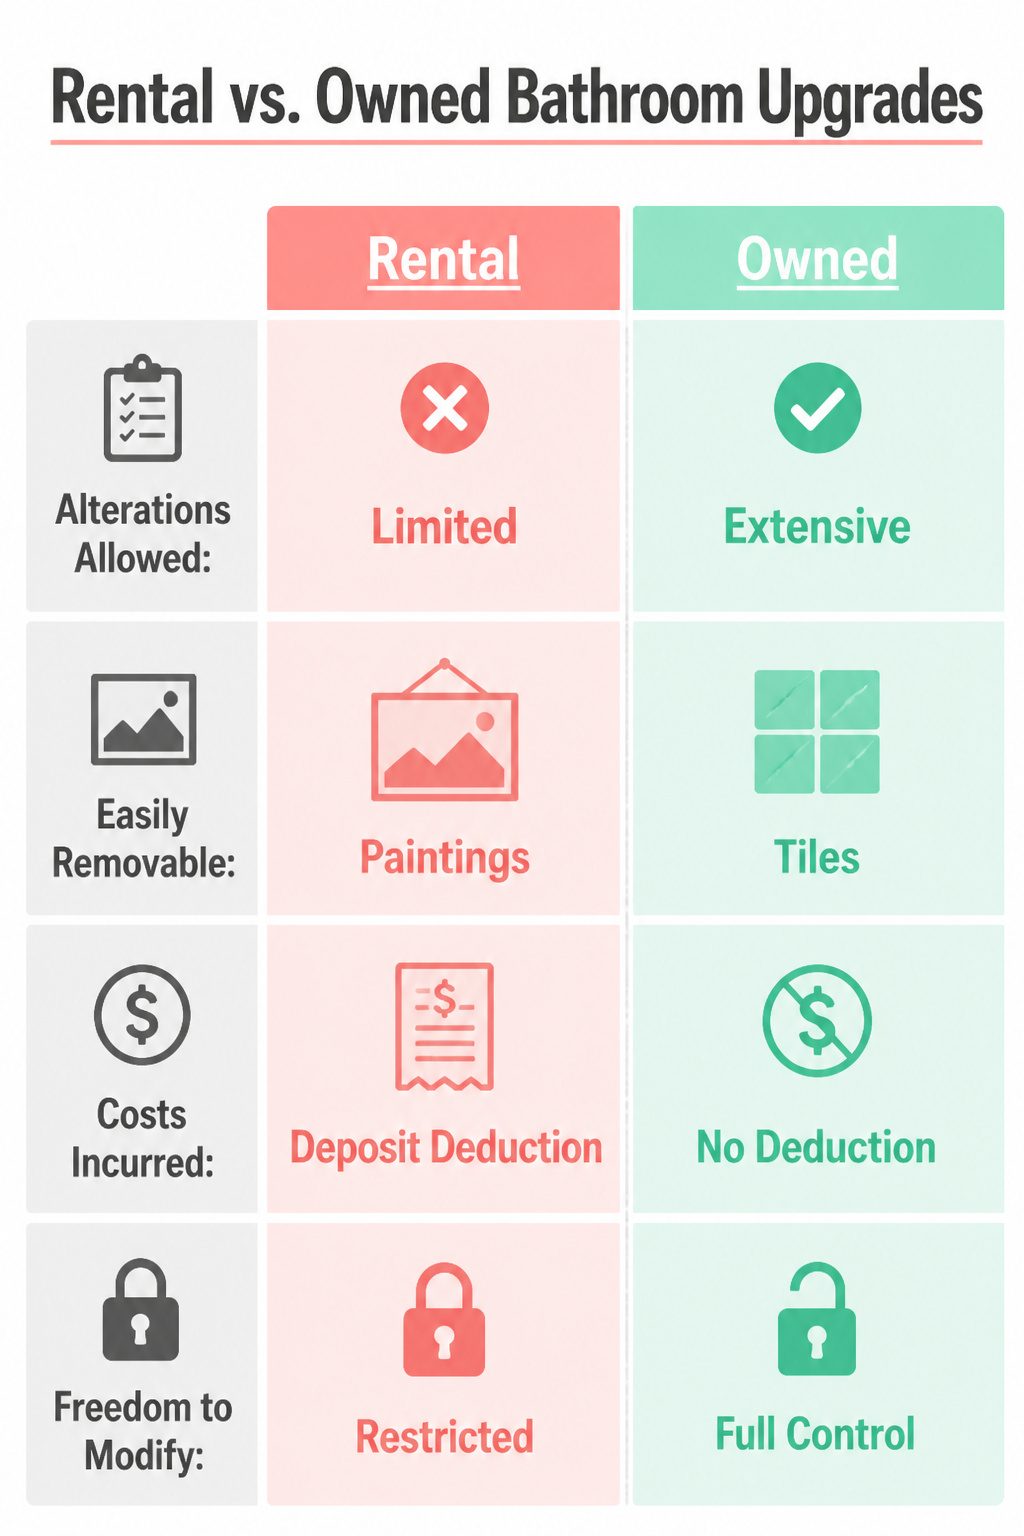
The first bathroom I tried to upgrade was a rental in Queens with a lease that called any alteration "fixtures permanently attached to the premises." That phrase sat on my desk for a week while I figured out what it actually caught.
Peel-and-stick tile over existing ceramic, a tension-rod shower caddy, and a toilet seat swap all came with me when I left. The freestanding over-toilet shelf and the adhesive mirror frame did too. What stayed behind was the caulk I replaced around the tub, the new showerhead, and the under-sink organizer that required drilling a single pilot hole. The landlord deducted $40 from my deposit for that hole, which taught me to read "alterations" against "normal wear and tear" line by line.
The updates that made him nervous were anything near plumbing, anything with adhesive backing that might lift glaze, and anything that read as "installed" rather than "placed." My second bathroom, in a co-op I now own, let me switch the vanity and tile the floor. The difference was not money alone. It was the freedom to measure once and commit.
Vinyl Plank Sizes That Work
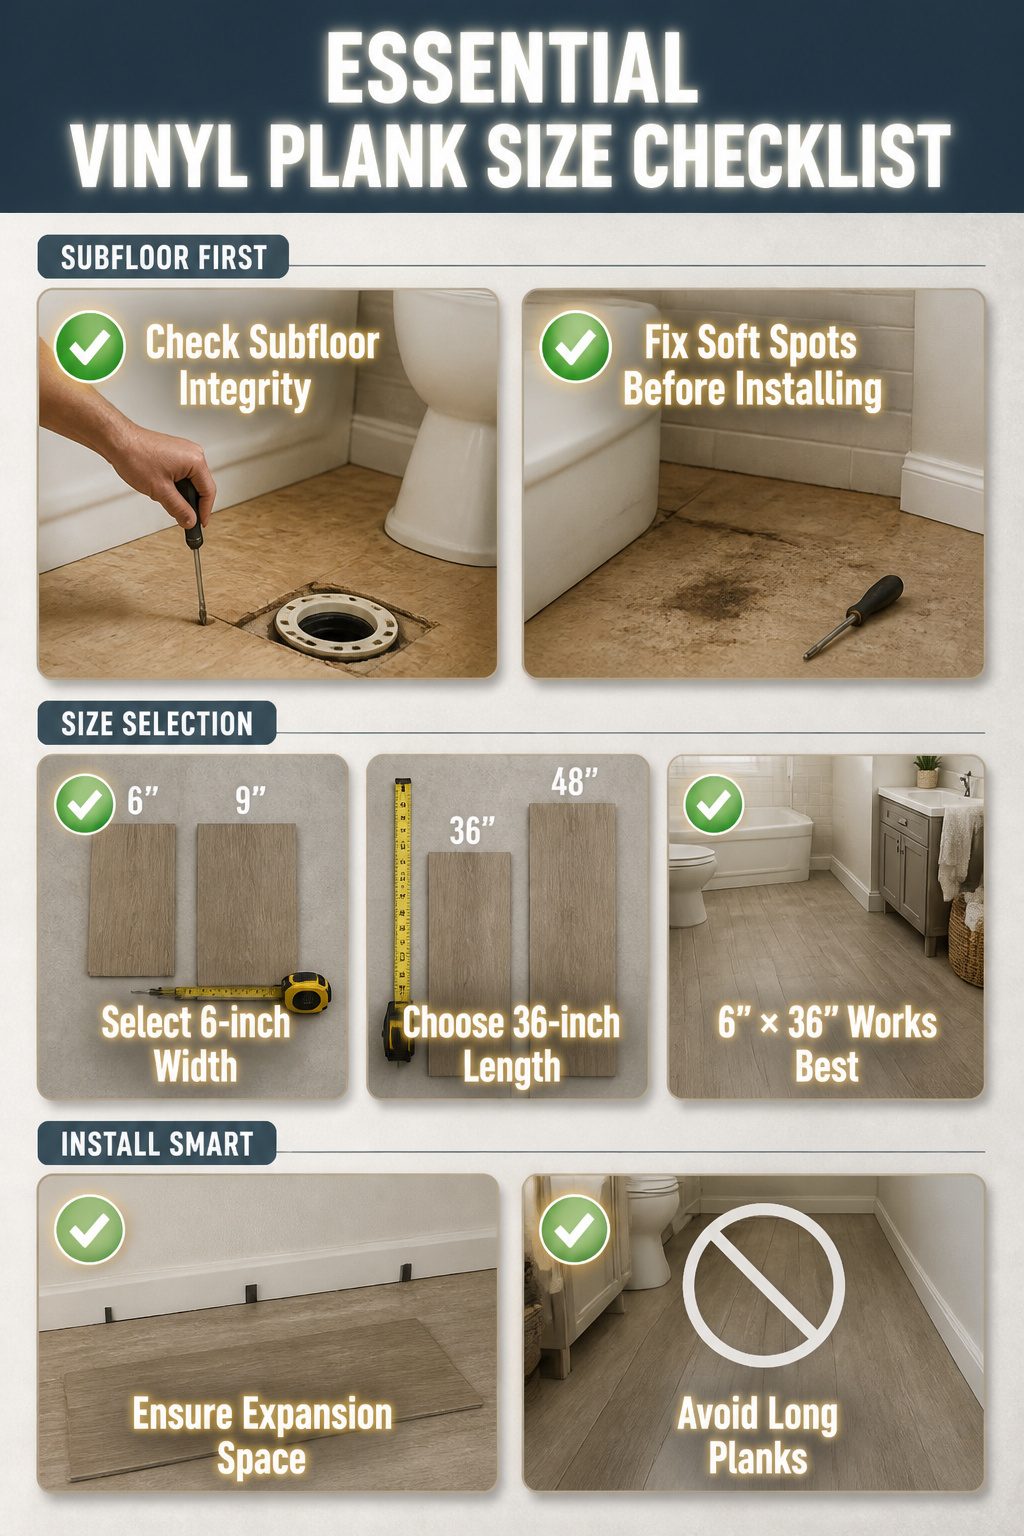
The 36-inch and 48-inch lengths and the 6-inch and 9-inch widths all look reasonable on the rack at the store. The difference only shows up once the planks are down and the bathroom is in use. A 48-inch plank runs wall to wall in a small bathroom with almost no cuts, which sounds efficient until humidity hits it and that long piece has nowhere to expand. Mine buckled along the seam after two months of steamy showers. I had laid it directly over what I assumed was a solid subfloor; the actual problem was a soft spot near the toilet flange I never thought to check. A 9-inch width in that same long length covers ground fast, but the proportions start to look like a hallway in a space under 40 square feet. The 6-inch width with the 36-inch length turned out to be the workable combination for my space: short enough to handle movement, narrow enough to read as tile scale rather than plank scale, and forgiving enough that the subfloor irregularity I eventually found and fixed did not telegraph through. The subfloor check comes first now. Rock the toilet, probe near the tub, and fix the soft spots before anything gets unboxed.
Frequently Asked Questions
What makes a small bathroom look and feel bigger?
Light colors, large mirrors, and clear glass surfaces all help a small bathroom feel larger than it is. Soft neutrals like warm white, beige, and soft gray bounce light around the room, while a single large mirror reflects window light across narrow walls. Replacing a shower curtain with a sliding glass door also opens up the shower area visually.
How much does it cost to remodel a small bathroom?
Small bathroom updates typically run from $3,000 to $15,000, with most projects averaging $115 to $300 per square foot. The exact figure depends on whether you keep the existing layout, do the demolition yourself, or pay professionals to move plumbing and wiring. A simple vanity swap and new hardware might cost $500, while relocating pipes with mid-grade materials and hired labor can push the total past $8,000.
What should I focus on with a small bathroom redesign?
Budget, layout constraints, and whether you rent or own should drive every decision. Rentals limit you to non-permanent changes like tension rods, peel-and-stick tile, and adhesive-mounted accessories, while owners can move plumbing and recess shelves into walls. In either case, keeping the color palette to two or three tones and choosing fixtures that preserve floor space will make the room feel intentional rather than cramped.